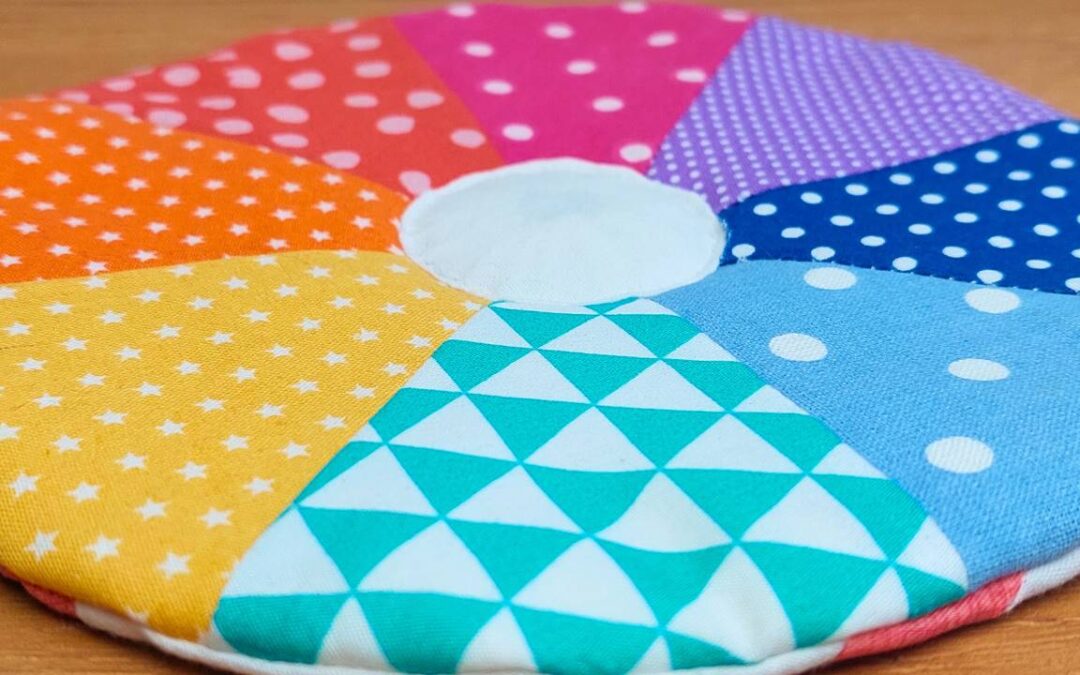
Today, we’re making a rainbow color wheel quilt block.
This sewing project is going to be an explosion of color and I can’t wait to make it happen!
This color wheel design is absolutely gorgeous!
I’m pretty sure this will be your favorite quilt pattern idea ever!
I’m using a couple of tricks I know to make this the most simple, more beginner-friendly I can.
This may look complicated when you look at it, but trust me anyone can do it.
How to Make the Rainbow Color Wheel Quilt Block
This is one of those mini quilt pattern designs that look complicated and expert level, when they’re actually pretty simple to make.
It doesn’t require and special rulers like the Dresden plate does, but you can use them if you’d like.
I prefer to create my own template and go from there.
This is a very simple color wheel design, I’ve seen other quilt blocks using 12 or more pie pieces.
I’m using just 8 and I love the result.
Color Wheel or Rainbow Quilt?
Well… for one thing, the colors are exactly the same…
Because for me… the rainbow combination just works, I used to make chakra blankets and whatnot, it just resonates with me A LOT!
And hey, if nature says it works, who am I to say otherwise?
So yeah, we’ll need purple, dark blue, light blue, green, yellow, orange, red and pink.
These quilt colors just go together and I love using them!

I guess the main difference between a rainbow quilt and a rainbow color wheel is obviously the shape!
All the rainbow quilts I’ve made use square quilt blocks.
You could, however, appliqué a color wheel to a white square of fabric and make an absolutely stunning color wheel quilt block from there.
I guarantee a whole quilt made that way will look absolutely gorgeous.
But for me, rainbow quilts call for color washes, the colors changing into the next softly, like a wave of color that runs through the quilt.
Let’s Make it Simple: Easy Color Wheel Quilt Block Pattern for Beginners
I said it and I meant it, this rainbow color wheel quilt pattern is meant to be beginner-friendly, so I’m making this as easy as I possibly can!
The thing that will help make this sewing tutorial easier is making the template for each piece and including the 1/4 inch seam allowance.
From there, all we need to use the 1/4 inch foot when we’re sewing the pieces together and it will turn out a perfect circle!
I mean, what can go wrong here?
It’s one of my favorite color combinations for sewing, it’s a cute little circle and it’s easy to make…
Have you ever heard of a color wheel?
Or a color circle?
It’s that wheel where you have the 3 primary colors and then between them you get all the colors that connect them.
It’s a great tool for learning color theory but also for painters, like myself.
Or quilters, also like myself.
It helps you pick the colors that go together as well as the ones that contrast the most.
That’s what it’s for in a nutshell and that’s what we’re trying to recreate here, except we’re using 8 slices instead of 12.
Sewing the MOST Amazing Patchwork Ever: Rainbow Color Wheel Mug Rug!
And it’s begging to be turned into a mug rug, it just is!
Can you imagine having your morning tea or cup of coffee using a stunning rainbow color wheel as a mug rug?
Mug rugs are beautiful, but they’re also very easy to make and very quick too!
So I figure, if I want to make a stunning rainbow color wheel quilt block that’s also beginner-friendly and a fun sewing tutorial, this is the way to go!
Rainbow Color Wheel Mug Rug Supplies
- Scraps of colorful fabric
- White fabric
- Colorful fabric square
- Rotary Cutter
- Rotary Blade
- 12” x 6” Quilting Ruler
- Cutting Mat
- Mini Iron
- Ironing Wool Pad
- Basic Sewing supplies: Pins, needles and thread
- ¼ on an inch foot (sewing machine)
Disclosure: some links are affiliate links. As an Amazon associate, I earn from qualifying purchases, at no extra cost to you.
Rainbow Color Wheel Mug Rug Requirements
- 8 4 inch x 8 inch Rainbow color fabric: pinks, purples, dark blues, light blues, greens, yellows, oranges and reds
- 6 inch x 6 inch White fabric square
- 8 inch x 8 inch Colorful fabric for the back (I used an old quilt block)
Step 1: Making the template

Let’s start by making our template.
We take a compass and we draw an 8 inch circle.
Followed by a 3 inch circle in the center.
Then, we divide our wheel into 8 pieces.
We take one of the pieces and add a 1/4 inch seam allowance on each side.
Then we cut that slice off and that’s our template, ready to go!
Step 2: Picking the fabrics

Okay guys this is the pieces I’ve picked from my scrap pile, in rainbow order.
And if you look at it, it’s a never ending cycle because after the red comes the pink and the sequence starts all over.
How perfect is that?
Step 3: Cutting the color wheel pieces

We use our template to draw our wheel slice and then we cut.
We do this for all of our 8 fabrics.
And, very soon, we’ll get a complete rainbow color wheel ready to go.
Step 4: Sewing the color wheel together

Time to sew guys!
I like to start by sewing them by pairs to make it quicker, a bit of chain sewing.
Then I go back and sew pairs together until I get two wheel halves.
And then I sew the two halves into one glorious, colorful color wheel.
When I’m first pairing the slices, I want to make sure the outer edges, the wider edge of the slices are nice and even.
If your slices aren’t perfectly equal and you’re trying to decide which part you want to match, it’s that part, the outer part.
We need as much of a perfect circle as we can make it.
Step 5: Pressing the color wheel

How gorgeous is our color wheel?
Let’s press it nice and flat, making sure our seams are also flat and all pointing in the same direction before we continue.
Step 6: Preparing the backing fabric

Okay guys, we need a back fabric for our mug rug, right?
We need an 8 inch square for it and you can go ahead and pick and fabric you prefer, even white if that’s your favorite.
I’ve decided to make this a reversible sewing pattern, so I’ve picked an old quilt block that was leftover from one of my many many many quilt block videos over on YouTube.
How cute will this look guys??
Step 7: Preparing the batting

Any quilt sandwich needs batting, so we need to cut a circle that’s the size of our color wheel to make our mug rug quilt sandwich.
I’m using 100% cotton batting because it’s what I have with me, but you can use whatever you prefer.
Step 8: Making the quilt sandiwch

We lay out our mug rug back, right side up.
Then we add our rainbow color wheel top, right sides together, so facing down.
And then we add our batting circle on top.
Then we pin all the layers in place.
Step 9: Sewing the quilt sandwich

Now we sew our layers together and I’m still using a 1/4 inch foot, just without the guide because I don’t want it to get stuck on the fabric.
We make a circle all around the edge of our batting, leaving a big enough gap to be able to turn it inside out.
Then we trim off the excess backing fabric and we turn this sandwich inside out, making sure to push all the edges out to make that smooth circle that we need for our rainbow color wheel quilt block.
Well it’s a mug rug, but it’s made out of a quilt block… You know what I mean!
Step 10: Pressing the color wheel mug rug

Before we do anything else, we need to press our rainbow color wheel to see where we stand.
Is it a quasi-perfect circle? Do we need to redo any of our seams?
That’s all the information you can only get after pressing all the layers into their rightful place.
Step 11: Closing the gap

Time to close our gap.
You can use the sewing machine for this, just make one seam all around the color wheel edge and seal the gap, if you’d like.
Personally, I prefer to close it by hand.
This allows me more control of the circle I’m sewing.
It also allows me to hide the stitches perfectly.
And I also like the fluffy look I get by not sewing the outer edges.
Step 12: Making the center piece

We still have a big whole in the middle of our rainbow color wheel right?
If we had made a color wheel quilt block, we would have appliqued it into the fabric and be done, but we chose to make a mug rug and that batting showing just won’t work.
So let’s make a yo-yo!
We start by cutting a 4 inch circle.
I picked white fabric, but black will work just as well!
Step 13: Sewing the center piece

Next step to making our yo-yo is stitching a large stitch all around that circle.
You can use the sewing matching if you prefer, just make sure to make it as big of a stitch as you possibly can.
Step 14: Closing the yo-yo

Now we make some yo-yo making by pulling on the thread we’ve just sewn into the circle and pull the edges in.
We pull it tight and we make sure that by the time we’re done, we’ve got ourselves a perfect circle.
We add a few stitches to the inner center of the yo-yo to make sure that circle remain perfect.
Then we press it flat.
And our center piece is done!
Step 15: Adding the yo-yo

We add our yo-yo center piece to our rainbow color wheel quilt block and we make sure it’s as centered as we possibly can make it.
We pin it in place.
Step 16: Sewing the center piece

And now we sew it in place, stitching as close to the outer edge of the yo-yo as we can.
Do this at a speed that’s comfortable for you, ideally we want this to be a nice, clean, round stitch.
It’s also our final step in this awesome sewing project.
Step 17: Our rainbow color wheel mug rug is done!

And look at this guys, how perfect does this look?
A reversible rainbow color wheel quilt block mug rug, try saying that 3 times quick!
You can quilt it, if you’d like.
Do some free motion or just outlining all the little colorful slices.
That will look great, particularly if you use a higher, loftier batting.
But for me, this is perfect.
I’m keeping this one for myself guys, I am in love!
Watch the full tutorial!
Guys, how awesome is this mug rug?
I have made so many over they years that I lost count but this one is truly memorable.
I can’t stop looking at it!
And if you want to watch the video of this colorful mug rug getting made, here it is!
Most Recent Projects
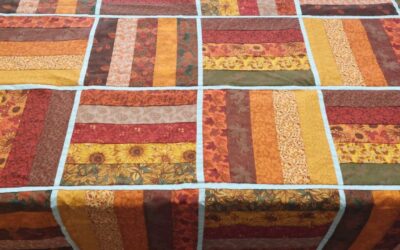
Incredibly Easy Stained Glass Quilt Pattern for Beginners
Today I’m making a stained glass quilt top. But...
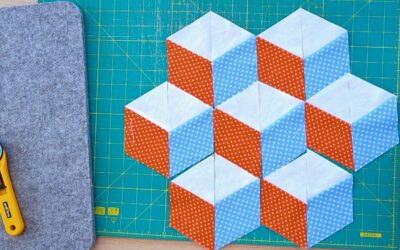
How to Make 3D Tumbling Quilt Blocks (No Y-Seams)
Today we’re a making tumbling blocks! And that...
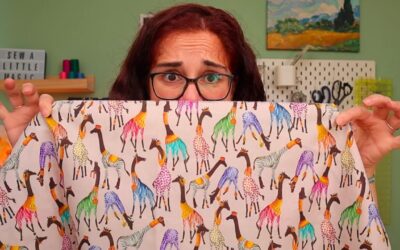
5 Practical Ways to Use Ugly Fabrics
Today I’m making a quilt using only ugly fabric....

About Me
I am a content creator, designer and maker of quilts and a hopeless cat lady. Being able to share all I know with you is a kind of magic I have never experienced before!