Today I’m making an easy watercolor quilt pattern that looks like a garden!
And this idea actually came to me as I was walking the dogs and getting lost in the woods.
I saw a little bird perched on a branch, surrounded by flowers and I just knew what I have to do.
Also, I have to say that the final result is so much better than I could ever have imagined it!
What’s a Watercolor Quilt?
So what exactly is a watercolor quilt?
A watercolor quilt is a quilt that is made to look like a traditional watercolor painting.
It’s an art quilt, if you will.
You essentially create a watercolor effect with fabric and, once you’re done, you get yourself a nice portrait of whatever you’re trying to recreate.
Let me show you!
How to Create a Watercolor Quilt Pattern
For this particular watercolor quilt pattern, I need to create all sorts of different zones.
We start out with a darker corner in blacks, blues, greys and browns because darker backgrounds create shadows and add depth.
Just like a watercolor painting!
I want to create a color gradient from the darkest I can to the lightest possible fabric, which is white!

And because this is a garden watercolor quilt, I need to pick flowery fabrics, right?
From the darkest fabrics to about the middle of the background, all flowers and leaves. So lots of pinks, reds, yellows and greens.
Then, as I move up, I want to create a sky. A light one at that, so I start with my light blues and finish with a solid white fabric.
And that’s it!
Easy Watercolor Quilt Pattern: A Garden Watercolor Painting
This watercolor quilt tutorial is a completely free pattern you can use again and again.
Or better yet, add your own changes and make it your own!
Watercolor quilting can be a lot of fun, particularly if you do it the way I do it.
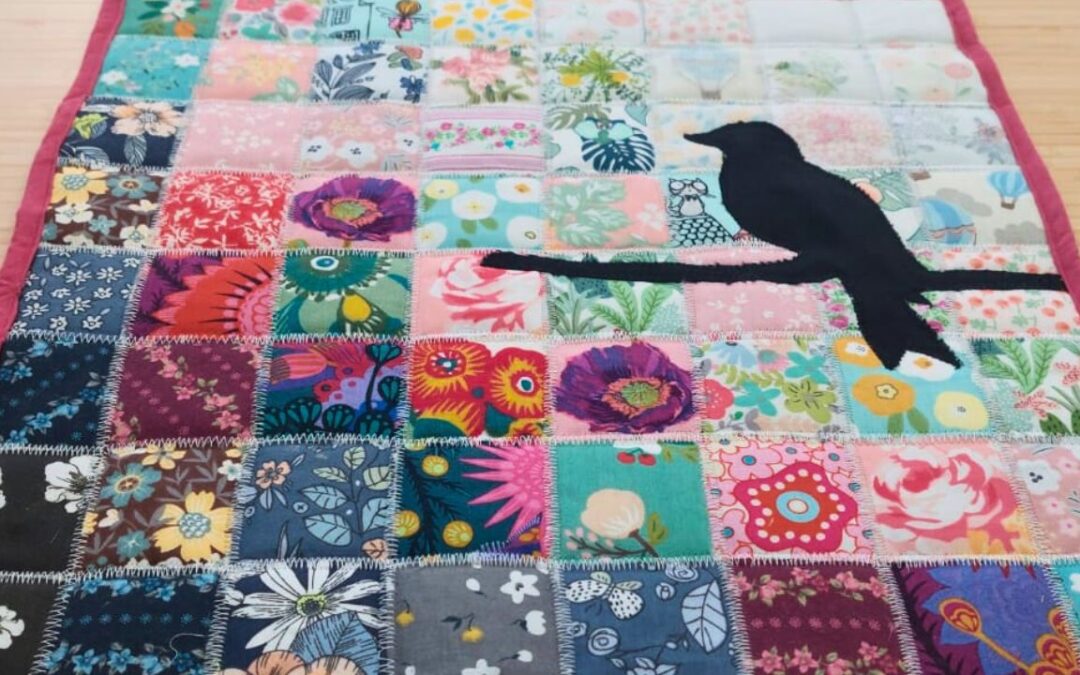
The important part here, is to have a background with a somewhat subtle color wash and a silhouette up front to cut through all those soft, flowery fabrics.
In the end, we should be able to look at the quilt and see a garden, with flowers in the back (some in the shade, others shinning brightly) and a bird on top, just doing its thing!
Garden Watercolor Quilt Pattern Supplies
- Flower patterned fabric
- Light blue fabric
- White Fabric
- Black solid fabric
- Backing fabric
- Batting
- Thermal adhesive
- Temporary glue pen
- Rotary Cutter
- Rotary Blade
- 24” x 24” Quilting Ruler
- Cutting Mat
- Mini Iron
- Ironing Wool Pad
- Basic Sewing supplies: Pins, needles and thread
- ¼ on an inch foot (sewing machine)
Disclosure: some links are affiliate links. As an Amazon associate, I earn from qualifying purchases, at no extra cost to you.
Garden Watercolor Quilt Pattern Requirements
For this pattern, I’ll need:
- 64×2 inch squares
- 17×17 inch batting square
- 19×19 inch backing fabric
Step 1: Fussy cutting the squares

Ok, I need to start by saying I never fussy cut. EVER!
It’s a waste of precious fabric as far as I’m concerned.
But this quilt demands it, so here we are.
I’ve selected all my flower fabrics, in whatever colors I own.
Then I created a small watercolor paper window to serve as my fussy cutting template.
Step 2: Cutting the squares

After using my template to draw my squares on the back of my fabrics, I start to cut.
I need 64 2 inch squares in total, from the darkest corner to the white in the top corner.
I advise you cut a few more squares so you’ll have more options to pick from when you’re creating your wash.
Step 3: Cutting the adhesive

After I’ve cut all my squares, it’s time to cut my 19 by 19 inch thermal adhesive.
I use heat n’ bond, you can use whatever you like.
Step 4: Attaching the squares

Now with the help of my temporary glue pen, I start adding on the squares and creating the wash I have planned for this watercolor quilt.
The good thing about this pen is, if I change my mind, I can just remove any square and try again.
Step 5: Making the wash

Time to make our wash!
I start with the darker fabrics at the lower left corner and build my way up.
You’ll want your bright colors in the middle of the wash, mixed in with some greens because gardens need green right?
Then, as you move up to the upper right corner you’ll want to start adding the light blues and the white fabrics, ending with a solid white.
Step 6: Turning the squares inside out

Now, because I have a very small square to build my wash, I need to take drastic measures.
So I’m turning some of my lighter squares inside out.
That way I’m creating an extra intermediate value between the light blues and the solid white that will make a big difference in the overall result.
Step 7: Cutting the batting and the backing fabric

Time to make a quilt sandwich!
I cut a batting square that’s larger than my quilt top and a backing fabric that’s larger than my batting because I want to self bind.
So the backing fabric needs to be at least 1.5 inches larger than the batting.
Step 8: Removing the adhesive cover and centering the quilt sandwich

Okay guys, time to remove the adhesive cover and center all our 3 layers.
Step 9: Activating the adhesive

Before we activate our adhesive and glue our squares to the interfacing AND the interfacing to our batting.
We need to press, not iron, we do not want our squares to move around or our interfacing to bend.
Step 10: Pining the quilt sandwich

Our quilt is looking gorgeous already but it’s time to sew all the squares in place.
But first we need to pin the top that’s glued to the bating to the backing fabric, which is the only loose piece at this time.
Step 11: Quilting the quilt sandwich

I’m quilting my garden with a tight zig zag stitch vertically and horizontally.
This is also a great way to hide any imperfections we may have and squares that don’t stack up perfectly together.
Step 12: Making a bird silhouette

And now that our quilt is nicely quilted, it’s time to add our bird silhouette.
You can draw your own bird or google it, print it and use some chalk to draw it onto some black fabric that you’ll then cut.
Step 13: Sewing a bird silhouette

I then used an appliqué stitch to sew our bird in place.
You can also appliqué the bird using the same zig zag stitch we used before, but I prefer this one.
Step 13: Folding the self binding

All there’s left to do now is complete our self-binding.
We fold our backing fabric over the top of our quilt twice, once to hide the raw edges and the other to make the binding.
Then we clip it in place.
Step 14: Sewing the self binding

And then we sew all around our binding, sewing as close to the inner edge as we possibly can.
Also making sure our corners as nice and mitered.
Step 15: The garden watercolor quilt is complete!

And guys, look at it, look at stunning garden watercolor quilt!
How unique is this?
You can create your own watercolor quilt with whatever theme you prefer, the possibilities are truly endless!
Watch the full tutorial!
Guys, how much fun was that?
And how easy and amazing is this garden watercolor quilt?
And if you want to watch the video of this garden watercolor quilt getting made, here it is!
Most Recent Projects
Incredibly Easy Stained Glass Quilt Pattern for Beginners
Today I’m making a stained glass quilt top. But...
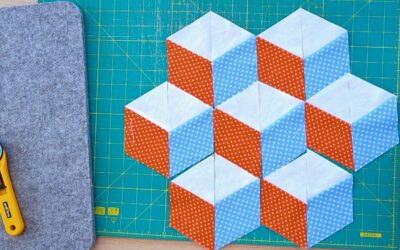
How to Make 3D Tumbling Quilt Blocks (No Y-Seams)
Today we’re a making tumbling blocks! And that...

5 Practical Ways to Use Ugly Fabrics
Today I’m making a quilt using only ugly fabric....

About Me
I am a content creator, designer and maker of quilts and a hopeless cat lady. Being able to share all I know with you is a kind of magic I have never experienced before!
Wonderful ideas! Your work is so inspiring – cannot wait to get started on new projects using your skills.
Thank you so much! I really appreciate it.