Today, I’m sharing how to make a color wash quilt.
I cannot believe how many awesome scraps of fabric I used to throw away before I started making this pattern.
I just didn’t know what to do with them, particularly the tiny ones, thought they were waste.
But they’re not!
They’re precious and if you don’t see that yet, you will, after doing this project.
Let’s do it!
What is the Color Wash Quilt?
This is the most fun I’ve had making a quilt top, hands down.
Because not only is this one of the most colorful patterns I’ve ever done, it’s also one of the most chill ones to make.
So what exactly is a color wash quilt?
Now, I know I tend to use rainbow colors a lot but a color wash can mean many things.
When I think of color wash quilt I imagine a big wave of color that changes as it progresses.
But if you use only one color, let’s say, blue, it can just change values of blue, from lighter to darker for example.
In which case, I guess we could also call it a color value quilt or a temperature quilt, but I just prefer to call is a color wash and be done!
How to Pick Fabrics for a Color Wash Quilt Top
For me… the rainbow combination just works, I used to make chakra blankets and whatnot, it just resonates with me A LOT!
And hey, if nature says it works, who am I to say otherwise?
So yeah, we’ll need purple, dark blue, light blue, green, yellow, orange, red and pink.
Those are our colors.
And if there’s any confusion about the sequence or the colors you need, just go ahead and google a color wheel, it’s all there!

The best part about our rainbow color wash is we’re making teeny tiny quilt blocks, which means we get to use our scraps to do it.
Which makes it a scrappy color wash!
So we just need to get into our scrap pile, our leftover fabric stash, whatever you prefer to call it, and either pick strips that are at least 1.5 inches wide or other pieces of fabric from which we’ll be able to cut 1.5 by 3.5 inch strips.
We need plenty of strips, in the colors I’ve mentioned, and the more different fabrics we get, the better, particularly for such a small quilt top.
Color Wash Quilt Challenge: Sewing a Scrappy Color Wash Pattern
I kind of wish this was a thing.
A Color Wash Quilt Challenge, every week or every month I’d have to think of a different color wash quilt pattern and just make a how to make a color wash quilt video for you guys.
You know what? I think I’ll do that!
This is number 2 actually, Terry Rowland’s version of a color wash quilt was number one, so I’m kind of already doing it!
You know what, this may be number 3, because we do have that watercolor quilt one I did before that also features a color wash…
We’re on a roll here guys!
I would think of ways to combine color values with scrap fabrics in all possible combinations and that would be that.
Using scraps, of course!
I like it!
Color Wash Pillow Cover Supplies
- Several scraps (strips) of colorful fabric
- A colorful fabric for the back of the pillow
- Rotary Cutter
- Rotary Blade
- 6” x 6” Quilting Ruler
- Cutting Mat (I used a rotating version)
- Mini Iron
- Ironing Wool Pad
- Basic Sewing supplies: Pins, needles and thread
- ¼ on an inch foot (sewing machine)
Disclosure: some links are affiliate links. As an Amazon associate, I earn from qualifying purchases, at no extra cost to you.
Color Wash Pillow Cover Requirements
I chose rainbow colors: pinks, purples, dark blues, light blues, greens, yellows, oranges and reds with centerpiece fabrics that contrasted the main fabrics.
I am making a total of 36 blocks with a final size of 3.5 inches. You’ll want to have about the same amount of blocks within the same colors as possible.
Per quilt block, you’ll need:
- 3 1.5 inch by 3.5 inch strips
For the back of the pillow cover you’ll need:
- 2 18 1/2 inch by 33 inch rectangle in a colorful fabric
Step 1: Cutting the strips

We went through our scrap pile, we picked all the pieces we could extract 1.5 by 3.5 inch strips from and we’re ready to cut.
We need 108 strips in total in rainbow colors, plus pink because… I like pink!
And if you happen to use a rotating cutting mat like I do, this is the right time to use it!
Personally I prefer to cut longer strips, meaning instead of making them 3.5 inches, I prefer if they’re 4 inches.
This is because when it’s time to sew I don’t want to waste a lot of time matching the edges.
And, if they’re bigger quilt blocks, I can just sew them and trim to the perfect size later.
Step 2: Organizing the strips by color

Okay guys time to make sure our strips are ready to be turned into quilt blocks!
We make 8 piles and make sure all the strips we have in each pile are multiples of 3 because we will be sewing them into groups of 3 per quilt block.
And this is all the organizing we need to make at this point.
Step 3: Building the quilt block

Because now it’s time to sew!
And I don’t want to plan out my quilt blocks, as long as I don’t have the same fabrics next to each other, I’m good.
Now, if you’d like to make this quicker, you’ll sew your strips into pairs first.
And then go back and add a third strip to each pair.
Before you know it, you’ll have all your 36 quilt blocks ready to go without having to give it much thought.
Which is my favorite kind of patchwork sewing!
Step 4: Pressing the quilt block

Our next step is, as usual, to press our quilt blocks.
We want them nice and flat, with the seams nicely pressed to make our lives easier for what comes next…
Step 5: Trimming the quilt block

Because what comes next is the trimming!
By the time we’re done we want to have 36 3.5 inch quilt blocks ready to go!
And, because I made my strips longer as I mentioned earlier, this is the time I make sure they’re all the right size, nice and squared.
I just prefer to do it this way to be able to sew without having to concentrate too much on what I’m doing.
Mindless sewing is my favorite part of the process…
Step 6: Making 36 quilt blocks

Okay guys, now is the time we make sure we have enough blocks in the right colors.
Which doesn’t necessarily mean we want the same amount of squares in all the colors.
In fact, with 8 different colors, that wouldn’t be possible.
At least that’s not how I like to make my color washes, but you can go ahead and create your own ratio.
I’ve made 3 purples, 6 dark blues, 4 light blues, 6 greens, 4 yellows, 4 oranges, 4 reds and 5 pinks.
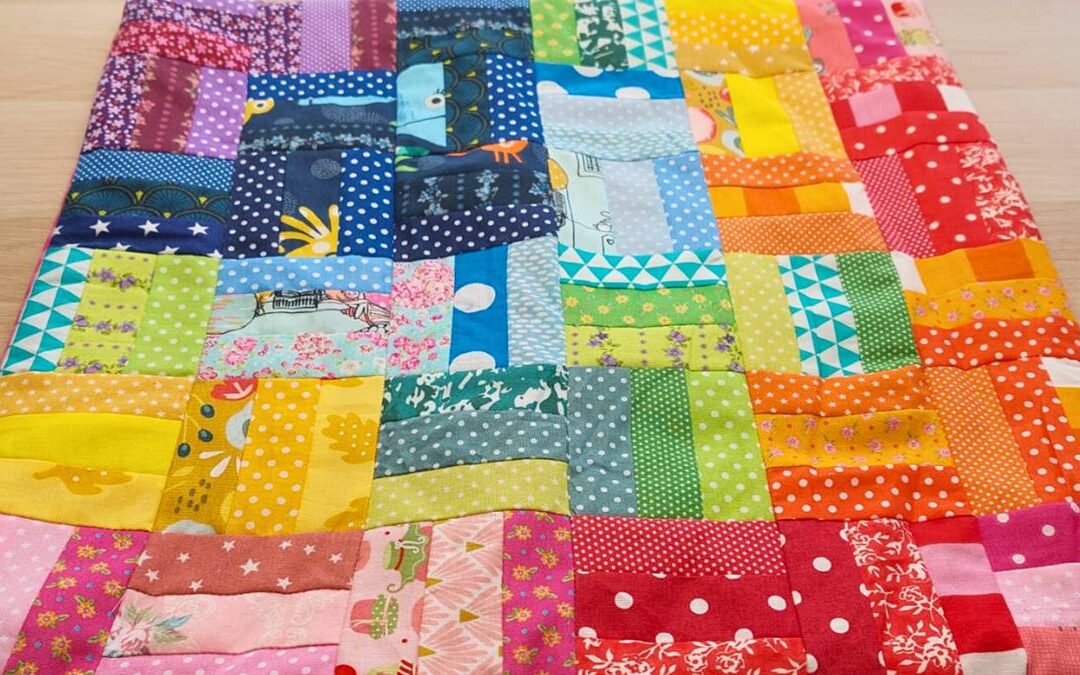
Step 7: Making the color wash

And now it’s time to create our color wash.
I’ve picked the top left corner to start with our darker strip quilt blocks.
We want a transition of colors that’s as smooth as we possibly can make it.
And a big thing here is we want to switch the direction of our blocks.
Some horizontal, others vertical.
Step 8: Sewing the rows

By now you should be looking at a gorgeous color wash quilt pattern, ready to be sewn.
I start by sewing the rows together.
To make life easier for yourself, make sure your seams match the direction in which you’re sewing.
It’s a pain sewing against the seams and have to fight them into place.
Step 9: Sewing the columns

Now it’s time to sew our columns together.
We want to nestle those seams, that means that whenever the seams meet, we want to put the seams from one row to the left and the seams from the second row to the right.
That way we won’t create a bulk and everything will be nice and flat.
Pin those seams in place to make sure you’ll be able to sew without them moving.
I’m using my 1/4 inch foot for this one to make sure all the quilt blocks are nice and even once they’re done.
Step 10: Press the quilt top
Press our quilt top to make it nice and flat. We want to press it, not iron it, meaning we won’t be moving the iron around because that may make your fabrics wonky.
We just drop the iron in place, keep it there for a few seconds and then move on to a different section, no dragging the iron around, please.
Step 11: Our color wash top is done!

Trim all the excess fabric off, if there is any.
And that’s it!
That’s how you make a color wash quilt top!
But we’re not done yet.
Because every time I get an 18 inch or so quilt top, I make a pillow cover.
It’s a reflex at this point, it really is!
Plus, this beautiful quilt pattern needs to be on show and I have just the place for it!
Step 12: Cutting the backing fabric

We need a colorful fabric for the backing of our pillow cover, right?
Something to match all the color from the front.
I have this picnic like fabric that I love, so I’m just going to cut two 18,5 inch by 15.5 inch rectangles.
You can make these pieces longer than 15.5 inches if you want, we’re making an envelope pillow cover and we want them to overlap nicely.
Step 13: Sewing the backing fabric seams

Now we need the seams that will be on show for our pillow cover to be nice and sewn.
I fold once to hide the raw edges and twice to make a nice even seam.
I pin it and sew it.
Easy peasy!
Do this for both pieces.
Step 14: Assembling the pillow cover

Now it’s time to assemble the pillow cover by placing both rectangles over the color wash top, right sides together, seams to the center.
And the reason why I’m keeping my pillow cover at 18 inches when my insert is 20 inches is because the insert isn’t very puffy.
Which means that if I made a 20 inch pillow cover, it would end up looking very flat.
But if you make a pillow cover that’s smaller than the insert, it will look very nice and full!
Step 15: Sewing the pillow cover

Okay guys, almost there!
We pin our 3 fabric layers and then we sew all around our pillow cover.
I like to sew it with the top side up because I want to make sure it’s nice and sewn, it’s the bit that will be on show and it needs to be perfect!
You can also sew over the back edges to reinforce those seams because we will be straining them when we’re adding the insert.
Step 16: Our pillow cover is complete!

After sewing, we just turn the whole thing inside out, being careful with the corners, we want then to stick out properly.
And then we add our 20 inch insert.
Here we have it guys!
Our colorful, beautiful, perfect color wash pillow, ready to make my sewing space brighter!
Watch the full tutorial!
I loved each and every step of it, I’m already thinking of all the other projects I can make using this color wash quilt pattern. Give it a try and let me know how it went!
And if you want to watch the video of this pillow cover getting made, here it is!
Most Recent Projects
Incredibly Easy Stained Glass Quilt Pattern for Beginners
Today I’m making a stained glass quilt top. But...
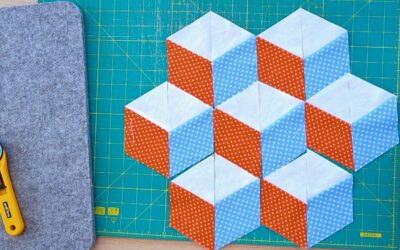
How to Make 3D Tumbling Quilt Blocks (No Y-Seams)
Today we’re a making tumbling blocks! And that...
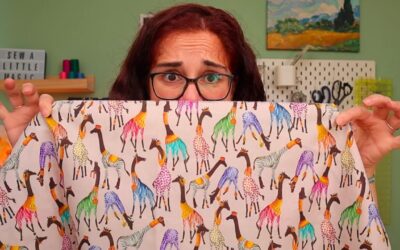
5 Practical Ways to Use Ugly Fabrics
Today I’m making a quilt using only ugly fabric....

About Me
I am a content creator, designer and maker of quilts and a hopeless cat lady. Being able to share all I know with you is a kind of magic I have never experienced before!