
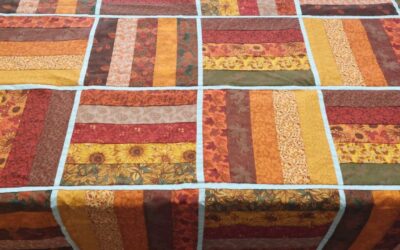
Today I’m sharing how to make a Bargello quilt step by step.
It may just be the most awesome thing I’ve ever done or my biggest disaster… I have no idea what to expect here, this is the first time I’m making one of these.
From the looks of it, it’s the quilt pattern of all quilt patterns, it looks absolutely insanely scary but in theory, it actually sounds very easy to make…
Let’s see how this goes…
What is a Bargello Quilt
So what exactly makes a Bargello Quilt Pattern?
I guess the best way to explain it is to say we’re making a quilt pattern that looks like it’s moving. An optical illusion of waves that ebb and flow, it’s quite hypnotizing!
The color contrasts, using different values, colors and scale of fabrics and the size of the strips are all it takes to create this stunning effect, you’ll see when we get there.
Quilters didn’t create the Bargello pattern, it was first found in needlepoint embroidery, in Florence, Italy, dating from the 17th century.
Traditionally, Bargello embroidery is sewn with wool thread on canvas, using mathematical patterns of stepped vertical stitches. They created these wave designs with yarn and thread that you can still see today.
Also called as the Florentine, Flame or Hungarian point, quilters adapted these patterns, sewing together long strips of material and cutting them crosswise to make lines of blocks, then offsetting the rows to each other.
How to Make a Bargello Quilt Pattern for Beginners
Now, this is an awesome quilt pattern using the Bargello technique, made with simple strips so you can use your leftover fabric or get yourself a jelly roll, whatever works best for you.
And… by the time we’re done… If this works… We’ll all be in awe, there really is no other word for it… I’m not overselling this one guys, this is the real deal.
If you’ve ever seen a Bargello quilt or googled a Bargello quilt, you’re thinking, she’s crazy, this is hard, this is expert level.
But guess what?
All it takes is some organizing and being able to cut fabric and sew straight lines, that’s it!

I’m not even sure I can call this a pattern because I’m not following any sort of template, I’m just going with the flow on this one to create the pattern I have in my mind, it’s that simple!
This is the cleverest pattern I’ve ever seen and the most stunning one too!
And, if I’m honest, the Bargello effect, let’s call it that, works with any color really, the ombré effect really is just an added bonus to the wavy feel of it because I’m not making a full sized quilt and I only have 15 strips to make the effect I’m looking for here.
So don’t feel obligated to do an ombré ok? Use whatever colors you want.
And you can mix your fabrics within the same colors, that won’t be a problem either, it will still look very awesome.
Bargello Quilt Idea: The Bargello Flame Quilt Pattern
Now, there are a couple of traditional Bargello quilt patterns out there, but two are the most notorious: The Surf Song and The Bargello Flame.
In today’s Bargello quilt tutorial, I am going to show you how to make a detail of the Bargello flame and for that we will be making a C curve.
The Bargello Flame quilt pattern showcases what could almost be called a Chevron, made with small colored squares.
The Surf song, however, is all about subtle S’s and a wave-like pattern of curves that resemble sea waves.
Over time, many talented quilters have developed stunning Bargello quilt ideas that you can easily find on Google and have your mind blown.
Bargello Flame Quilt Supplies
- Strips of colorful fabric (pink in this case)
- Rotary Cutter
- Rotary Blade
- 12” x 6” Quilting Ruler
- Cutting Mat
- Mini Iron
- Ironing Wool Pad
- Basic Sewing supplies: Pins, needles and thread
Disclosure: some links are affiliate links. As an Amazon associate, I earn from qualifying purchases, at no extra cost to you.
Bargello Flame Quilt Requirements
- 15 2×30 inch strips of colorful fabric that contrasts well together
Step 1: Cutting the strips

First we pick the fabrics we want to work with and then we cut 15 2 by 30 inch strips.
If you’re using a Jelly roll, there’s no need to cut it, just use the 2.5 inch strips and it will be perfect.
Step 2: Making the sequence

And now that we have our 15 scraps, we want to create a color sequence we like.
Since I’m trying to make an ombré, I want to go light to darker and then make it really dark in the middle, before I go back to light.
I want to make it clear one more time that you do not need to make an ombré to create a successful Bargello quilt pattern, as long as the colors work with each other, it’s fine.
Step 3: Sewing the strips

And then, of course, we sew all the strips together.
We want to make sure to sew our strips together as perfectly as we possibly can.
And I’m not the most precise quilter out there, but if I want to have clips, lined squares, I need to be extra careful…
Step 4: Pressing the strips

Pressing our seams flat is always a good idea but, for the Bargello, it’s even more important.
We need flat seam to be able to cut our strips perfectly.
We need our strips to be as straight and as flat as we can possibly make them.
This is extremely important for what comes next…
Step 5: Making a tube

Okay, our strips are cut and pressed and flat and now we need to make a tube.
So I fold my strip rectangle in half, making sure all the strips are nice and lined.
And then I sew both ends together, closing the rectangle into a tube.
Step 6: Cutting the strips

And now comes the trickiest part of this whole thing: The cutting of the strips.
Why is is tricky?
First, we need crisp, perfect cuts. So go get a new blade if you’re not confident your current one is sharp.
Second, we need the strips to be lined up. if it means we need to pin the whole thing together to make sure of that, so be it.
Third, we need to check the seams once again and go back to the iron if necessary to make them all flat.
And only THEN we start cutting.
Let’s start by trimming off the end, we need a clean end to start cutting our strips.
First strip we cut is 1 ½ inches. Second is 1 ¾, Third is 2 inches, Forth is 2 ¼ , fifth is 2 ½,, 6th is 2 ¾ and 7th is 3 inches.
Okay, the 3 inches is our biggest piece, so from there we start to go back so the 8th is 2 ¾, 9th 2 ⅕, 10th 2 inches and so on. (1 ¾, 1 ½ and 1 ¾ again)
And that’s all the cutting done!
Step 7: Numbering the strips

Okay guys, we have survived the cutting bit, now we need to number all our strips in sequence to make sure we don’t misplace one or make any mistakes.
This way, even if they fall to the floor or your cat grabs one and runs off (true story!!) You’ll always know where you stand.
It’s also important to help you keep track of where your strips start.
Step 8: Creating the Bargello Quilt Pattern

Because now we start to create our own pattern.
This is what looks like the trickiest part of making a Bargello quilt pattern but it is actually quite simple, as long as you keep it organized.
So here’s how we create a Bargello flame quilt pattern.
We take strip number one and we rip the seams at the top of that fabric square, right by the number we just added.
You open the strip up and you lay it on the table.
Step 9: Mismatching the squares

Next you grab strip number two and you rip the seams between the first and the second square.
And, as you open the second strip up and lay it on the table, you can see that the entire row of squares has gone down one place.
For the third strip, you rip the seam between the second and the third square.
You see where this is going right?
We just keep adding one more square to create a ladder effect.
Step 10: Making a C curve

That is, until we reach the middle, our 8th strip, the widest one, the one that is 3 inches wide.
Now, if we we’re making a Surf Song Bargello quilt pattern, we would just keep going until the end, but we’re making a Flame pattern, so we need a C curve.
So we just make a strip exactly like the 7th one, meaning the one that came BEFORE the larger 3 inch strip.
The first square featured on that 7th strip is the exact same one we want for the 9th strip.
Then the 10th is the same as the 6th, the 11th the same as 5th and so on.
Step 11: Sewing the Bargello Quilt Top

Okay guys, time to sew the whole thing!
The only thing to keep in mind here is to nestle the seams.
That means that when two seams meet (one from each strip) you need to point them in different directions.
Doing this prevents the fabric bulk from forming in that area and give you a much cleaner, smoother result.
Step 12: Pressing the Bargello quilt top

And once that’s done, we press it one last time so we can take a full advantage of the gorgeousness that is the Bargello Flame Quilt pattern.
Step 13: The Bargello quilt pattern is done!

And here it is guys!
And this is just a small detail of what a full fledged Bargello design could be.
If you keep repeating this pattern to the side, you create the flames.
If you mirror it to the left, you’ll get a cute cross in the middle and an overall round shape.
The possibilities are truly endless!
Watch the full tutorial!
And here we have it, our stunning Bargello quilt pattern.
How simple was that to make? As promised!
And if you want to watch the video of this awesome Bargello quilt pattern getting made, here it is!
Most Recent Projects
Incredibly Easy Stained Glass Quilt Pattern for Beginners
Today I’m making a stained glass quilt top. But...
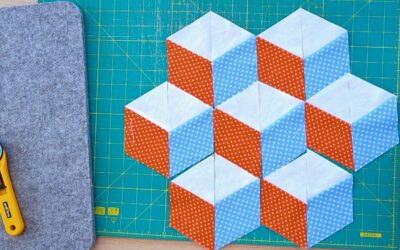
How to Make 3D Tumbling Quilt Blocks (No Y-Seams)
Today we’re a making tumbling blocks! And that...

5 Practical Ways to Use Ugly Fabrics
Today I’m making a quilt using only ugly fabric....

About Me
I am a content creator, designer and maker of quilts and a hopeless cat lady. Being able to share all I know with you is a kind of magic I have never experienced before!