Today I’m going to show you how to quilt a hexagon quilt.
This one is so cool, so original, I can’t believe this is the first time I’m making this quilt pattern!
We are playing with hexies today.
Black and yellow hexie quilt blocks because we’re thinking bees and honeycomb patterns.
Can you imagine the cuteness?
AND we’re making it a Mug Rug, which is the quintessential quick, fulfilling, easy sewing project idea for when you’re trying to get your sewing on and don’t have a lot of time.
How to Sew Hexagon Quilt Pieces Together
When we think of hexagon quilt blocks or pieces, immediately we imagine hexagonal pieces of fabric folded around a piece of paper.
Because hexies are usually used in English paper piecing, right?
And all those pieces then turn into a hand-sewn hexagon quilt and it’s absolutely gorgeous and unique, but it’s also a lot of trouble.
Well, it doesn’t have to be.
Hexagon patchwork can be quick and simple too, as long as you do it the right way.
And, for me, that’s using Quilt as You Go.
How to Machine Quilt a Hexagon Quilt Block Using Quilt As You Go
Machine quilting your hexies is the best way to create a cute and easy honeycomb hexagon quilt.
Quilt as You Go (QAYG) means treating each hexagon quilt block as if it were an individual quilt.
You make a quilt sandwich for each hexie quilt block (top, batting and backing fabric) and you sew it.
You do that to all the individual quilt blocks and then you sew them all together.

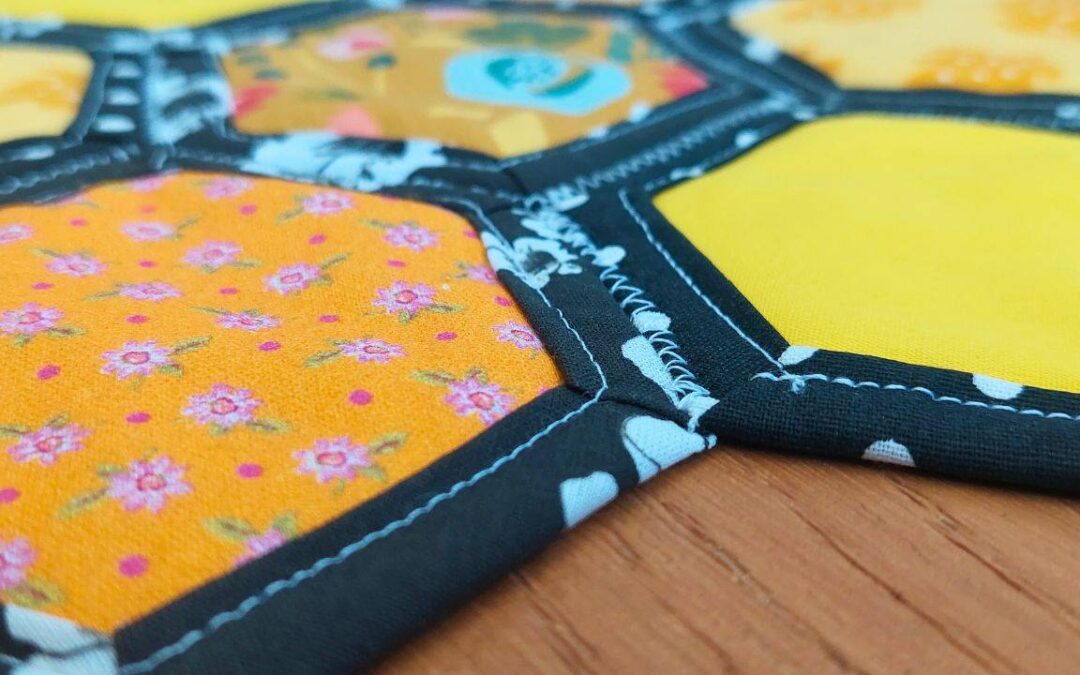
You can sew your honeycomb quilt pattern by hand, with a straight stitch or, my favorite option, using a zig zag stitch.
Using a zig zag stitch means you can have a reversible honeycomb mug rug because there will be no ugly seams showing.
The zigzag catches both pieces and joining them effortlessly.
Quilting Idea for a Hexagon Quilt: The Honeycomb Hexagon Quilt Pattern
Now, if you’re going to make a yellow and black hexagon quilt pattern, you’ve got to make a honeycomb, right?
It’s just asking for it!
And a honeycomb pattern is such a versatile one!
You can make a mug rug, like we’re making.
It’s also the perfect table topper and, if you make your hexagon fabric pieces larger, you can easily make it a place mat too!
Honeycomb Mug Rug Supplies
- Several scraps of yellow fabric
- Black fabric
- 100% cotton batting
- Rotary Cutter
- Rotary Blade
- 6” x 6” Quilting Ruler
- Cutting Mat
- Rotating Cutting Mat (optional)
- Mini Iron
- Ironing Wool Pad
- Quilting Clips
- Basic Sewing supplies: Pins, needles and thread
- Any regular foot (sewing machine)
Disclosure: some links are affiliate links. As an Amazon associate, I earn from qualifying purchases, at no extra cost to you.
Honeycomb Mug Rug Requirements
This is what you’ll need to create your own Brick Wall Mug Rug using the Quilt As You Go method:
- 7 5″x5″ squares of yellow fabric
- 7 5″x5″ squares of 100% cotton batting
- 7 7″x7″ squares of black fabric
Step 1: Create the hexagon template

If you don’t have one of those fancy hexie rules, no worries, you don’t need one!
Let’s create our very own hexagon right now, no compass required.
We draw a 4 inch line and mark all the inches along the way.
Now we draw a 4 inch line over the 1 inch and the 3 inch marks.
And now, aligning with the middle of the original line, we draw diagonal 4 inch lines.
Next, we trace our hexie joining all the lines.
And this is our template.
Step 2: Cut the hexagons

Okay, let’s get to it!
So, how much fabric do I need for a hexagon quilt?
Well, for this particular honeycomb pattern, we need to cut 7 yellow hexagons.
Let’s go ahead and do that.
These are 4 inch hexagons, made using the template we’ve just created.
Step 3: Cut the backing fabric

Next we cut the backing fabric and for that we need 7, 6 inch hexagons.
And the way we get them is we get our hexagon paper template. we mark all the sides of it.
Then we take our ruler and we add one inch to each side of those markings.
And that’s how we get our larger hexies.
Step 4: Cut the batting

Final piece of our sandwich is the batting.
We want 7, 4 inch batting hexagons so we use our template to make them as well.
Step 5: Make the quilt sandwiches

Let’s make some sandwiches!
We start with the backing fabric, right side down. Then we add the batting and then the yellow hexagon top.
We do this 7 times total.
Step 6: Press the quilt sandwiches

Before we move forward, a very important step is to press our mini quilt sandwiches.
When you’re making a hexagon quilt, you want your pieces nice and centered.
And you also want to make sure that the quilt layers don’t shift as you work on them.
One way to make sure that happens is to press the layers in place because, even without any adhesive, the 100% cotton batting sticks to the fabrics with the heat.
Step 7: Create the self binding

With self binding, of course.
That’s the whole point of making the backing fabric bigger than the other layers.
This way you can fold the backing fabric over the top and bind it without bias tapes and whatnot.
So you fold your backing fabric once to hide the raw edges and then you fold it again, over the top, to make the binding.
To keep it in place you can pin it, press it or use the very handy quilting clips.
As for the corners, the good news is hexagon corners fold themselves, no need to do anything other than to fold the fabric over.
Step 8: Sew the hexie sandwich

Okay guys, time to get our mini hexie quilt sandwiches to the sewing machine.
Another perk of using Quilt as You Go, no need to feed giant layers of fabric to our home sewing machine, just a teeny tiny hexie.
We want this binding to be thin and we want to sew as close to the inner edge as we possibly can.
Another alternative is hand sewing the binding with a hidden stitch.
Step 9: Sew the hexies together

Okay guys, time to create our honeycomb.
That’s a simple pattern with 3 rows of 2, 3 and 2 hexagon mini quilts.
And, like I’ve mentioned, the absolute best way to sew them together is using a zig zag stitch.
It doesn’t need to be too large a stitch, just a regular size will do.
And even if the hexies turn our a little bit wonky, don’t worry, just press them together as you feed them through the machine.
Just be careful not to overlap them. Side by side, not one on top of the other.
It will look perfect once you’re done!
Step 10: And were done!

And this is it, our precious honeycomb pattern mug rug, made so quickly!
How much fun was that guys?
And yes, you can make this in different size, you can use other colors, you can do some yellow in black hexagons and combine them with some black in yellow ones.
It’s totally up to you!
Watch the full tutorial!
And that’s it guys, the easiest, quicker, most original hexagon quilt block pattern ever!
How awesome was that?
If you want to watch the video of this quilt top getting made, here it is!
Most Recent Projects
Incredibly Easy Stained Glass Quilt Pattern for Beginners
Today I’m making a stained glass quilt top. But...
How to Make 3D Tumbling Quilt Blocks (No Y-Seams)
Today we’re a making tumbling blocks! And that...

5 Practical Ways to Use Ugly Fabrics
Today I’m making a quilt using only ugly fabric....

About Me
I am a content creator, designer and maker of quilts and a hopeless cat lady. Being able to share all I know with you is a kind of magic I have never experienced before!