
Today I’m making a modern chevron quilt.
It’s a 500 year old classic quilt… but with a modern twist.
And if it ends up looking anything like what’s in my head, this could very well be the most gorgeous quilts I’ve ever made.
Many quilters make a very common mistake with chevrons that pretty much ruins the whole thing.
Let’s try not to make it this time…
And to make this even more challenging, I will be using my scraps.
I cannot wait to show you this, let’s get to it!
What’s a Chevron Quilt?
So what exactly is a chevron quilt pattern?
We’re talking about one of the most famous patterns in history that dates back to ancient Greece and as early as the 1800.
It was used in England in the 14th century and it’s still used today in military uniforms.
And a LOT of quilts all over the World.
But we’re adding a twist!
Instead of making rows of chevrons all in the same color or even doing one complete chevron in the same color, we are mismatching our colors.
So when the left side of the chevron is in color, the right side of the chevron will be white.
Likewise, then the left side of the chevron is white, the right side is in color.
This provides a fresher, softer quilt pattern that helps the eye rest while creating a much more interesting pattern.
What’s the Difference Between a Chevron and a Herringbone?
The Chevron pattern often gets confused with another pattern: the Herringbone.
That’s the mistake we often make.
The difference is subtle, herringbones use 90º angles whereas chevrons use 45º angles.
Also, the two sides kind of overlap each other, one rests on top of the other and it creates this really cool zig zag in the middle…
Ah yes, and it’s not a zigzag pattern either.
Because multiple chevrons next to each other always form a zig zag but not all zig zag patterns are chevrons…

And I promised you a modern chevron and I meant it… well, this is one of the modern ways, really, because there are a few!
But my version is, I think, the easiest one.
Anyone can do this and if you’d like, you can use pre-cut fabrics, like a charm pack or something, it will save you so much time because you won’t have to cut as many fabrics.
You’ll just need white squares in the same size as the pre-cut ones.
Making a Modern Chevron Quilt: Broken Chevrons
And guys, the fact that I’m using fabric scraps for this, is just perfect!
So how do you make a modern chevron quilt pattern using scraps?
Easy, you make them using half square triangles.
Now, because I have big enough scraps to make my squares, I will be making 4 half square triangles at a time, but if your scraps happen to be smaller, just make 2 at a time, no problem.
Broken Chevron Quilt Pattern Supplies
- Colorful fabric
- White Fabric
- Rotary Cutter
- Rotary Blade
- 6” x 6” Quilting Ruler
- Cutting Mat
- Mini Iron
- Ironing Wool Pad
- Basic Sewing supplies: Pins, needles and thread
- ¼ on an inch foot (sewing machine)
Disclosure: some links are affiliate links. As an Amazon associate, I earn from qualifying purchases, at no extra cost to you.
Broken Chevron Quilt Pattern Requirements
I chose rainbow colors: purples, dark blues, light blues, greens, yellows, oranges and reds. For this pattern, I’ll need:
- 18x 6 inch white squares
- 18x 6 inch squares in all different colors or the rainbow
Step 1: Picking the scraps

We went through our scrap pile, we picked all the pieces we could extract 6 inch squares from.
The only rules here are, the colors need to be right and the size needs to fit what we need, that’s it!
Step 2: Cutting the squares

Then we go back and cut 18 more 6 inch squares in white fabric.
Step 3: Pressing the squares

Our next logical step is to press our fabric squares.
Here’s the thing, half square triangles can be easy enough… if we follow all the necessary steps.
Sewing half square triangles using creased fabric is a recipe for disaster though.
Step 4: Making the color sequence

Now that our fabric squares are cut and pressed, we’re ready to start sewing.
But first, we need to make sure our rainbow sequence is in place.
So pink, red, orange, yellow, green, light blue, dark blue and purple.
And, of course, if we were to continue our sequence, and we will, following the purple would be the pink and we would start all over again…
Step 5: Making half square triangles

Because I was able to cut 6 inch squares out of my stash, I want to make 4 HST at a time.
We take one color fabric and one white fabric and join the two, right sides together.
Then we sew ALL 4 sides.
Step 6: Cutting the half square triangles

Next step is taking our sewn squares and cutting them diagonally twice (left to right and right to left).
And that’s how we get 4 brand new Half Square Triangles ready to go!
Step 7: Trimming the half square triangles

Another major step that is often overlooked is trimming our half square triangles before we can use them for our quilt pattern.
Wonky HST make for wonky quilts.
So we need to make sure that they’re nice and straight and also, all the same size.
When trimming HST keep in mind that you need to align your ruler’s 45º angle with the line where the two fabrics meet to keep the angles straight.
After trimming this one, we need to repeat all these processes 71 more times.
Step 8: Making the puzzle
Okay guys, we are ready to puzzle!
Remember, this is a modern broken chevron, so we mismatch the two sides, one side color, the other side white.
The sequence remains the same, we start with pink and we end with pink once more.
Let’s get to it!
Step 9: Sewing the quilt pattern
Our pattern is looking awesome and we’re ready to sew!
Unlike most projects, I’m doing columns first and then the rows.
Remember to nest the seams to make sure we get nice, pointy chevrons.
Sometimes it doesn’t make much of a difference, but for this one it really does!
Step 10: Press the quilt top
Our broken chevron sequence is complete and all we need before we call it a day is to press it.
We want all those seams nice and flat so we can enjoy the beauty of what we’ve just made.
Step 11: Our chevron quilt pattern is done!

And guys, look at it, look at our modern chevron quilt with the rainbow sequence right here.
How stunning is this?
Now, if you want to make a bigger piece, all it takes is repeating what we just did as many times as you want it, for in width and length.
As is, this makes for an awesome table runner top!
Watch the full tutorial!
Guys, how much fun was that?
And how absolutely gorgeous is this rainbow wash made of half square triangles?
And if you want to watch the video of this rainbow quilt pattern getting made, here it is!
Most Recent Projects
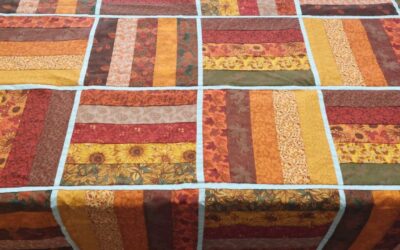
Incredibly Easy Stained Glass Quilt Pattern for Beginners
Today I’m making a stained glass quilt top. But...
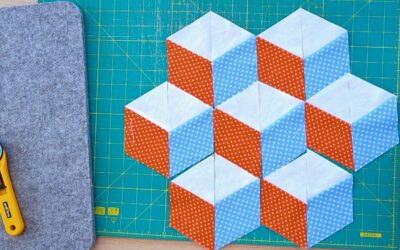
How to Make 3D Tumbling Quilt Blocks (No Y-Seams)
Today we’re a making tumbling blocks! And that...
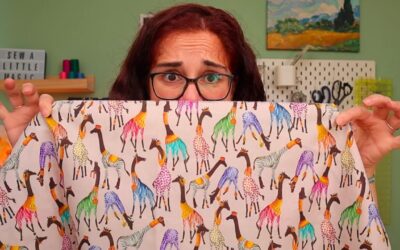
5 Practical Ways to Use Ugly Fabrics
Today I’m making a quilt using only ugly fabric....

About Me
I am a content creator, designer and maker of quilts and a hopeless cat lady. Being able to share all I know with you is a kind of magic I have never experienced before!