Today’s the day we add some positivity to our lives!
Because we’re making a Plus Sign quilt pattern!
This is a new pattern for me, not really sure how this is going to work… this can turn out even wonkier than usual if that’s even possible.
Are you ready for this one? I’m not sure I am…
Let’s go!
What is a Plus Sign Quilt Pattern
The Plus Quilt block pattern has been around for longer than you may think.
Some of the most popular Plus quilt designs were signature quilts made in the early 1900s to support the Red Cross during World War I.
Individuals and businesses would pay a small fee to have their name embroidered on the quilts, and then the finished project would be raffled off to generate additional funds for the cause.
How awesome is that?
If you want, you can Google “Plus Sign Quilt History” and check our what those early versions looked like.
So, so lovely.
How to Make a Simple Plus Quilt Pattern for Beginners
Now, there are a couple of versions for making this quilt, some more complicated than others.
I, as usual, am making the simplest, easiest one.
So essentially I’m just going to take 8 different fabrics and I’m going to cut them into strips.
But, of course, you can totally use a Jelly Roll for this and save yourself the trouble of taking this initial step.

Then, I’ll take each strip and cut the 3 pieces I need to make each plus, one rectangle and two squares.
After that, all I need to do is to form my pattern of pluses and sew.
Just be aware that these pluses don’t line up vertically or horizontally, okay? If anything, they line up vertically…
I’ll show you what I mean in a bit.
Create Your Own Modern Plus Sign Quilt in No Time
Now, if you want to create your own Plus quilt pattern easily, it helps if you’re using some sort of pre-cut fabric.
I’ve mentioned Jelly Rolls, but I’m actually using a bundle of fat quarters.
Using fabric bundles is the best way, as far as I know, to make sure the fabrics work well with one another, the fabric mix has been curated to make sure it works.
Another thing I did that makes life so much easier was to cut the fabric into strips before cutting what I needed from each strip, instead of cutting all the pieces separately.
I also made sure to chain sew my pieces to save myself some time. Just be careful to know when the chain starts and ends, don’t just cut the pieces out or you’ll be struggling to put the puzzle back together…
I know I did!
And, as always, I highly recommend you use Quilt as You Go for your quilt, instead of doing the traditional quilt sandwich.
That way you’re quilting your piece and you sew the strips together, the time and trouble saved by doing this alone is so worth it!
Last but certainly not least, self bind.
Pick a backing fabric that’s at least 1.5 inches larger than the batting and the top and just use it to bind your quilt instead of having to use bias tape and sew it one separately.
Plus Quilt Supplies
- A bundle of fat quarters (I used 8 different fabrics)
- 100% cotton batting (you can use whatever you prefer)
- Rotary Cutter
- Rotary Blade
- 12” x 6” Quilting Ruler
- Cutting Mat
- Mini Iron
- Ironing Wool Pad
- Basic Sewing supplies: Pins, needles and thread
Disclosure: some links are affiliate links. As an Amazon associate, I earn from qualifying purchases, at no extra cost to you.
Plus Quilt Requirements
- 8 Fat Quarters of different fabrics
Step 1: Cutting the strips

Let’s get started!
I’ve got 8 fat quarters of different fabrics and I want to cut 2 inch strips from each of them.
For the size of the piece I’m making, two strips is enough.
If you want your to be a bigger piece, just cut more!
Do this for each one of the fabrics.
Step 2: Cutting the pieces

And now we cut the pieces we need for our pluses, which is 1 2 by 6 inch rectangle and 2 2 by 2 inch squares.
From the strips I’ve cut, I’m able to make 3 pluses from each fabric.
And, again, this is your project, if you want your pluses to be bigger or smaller, just adjust the sizes accordingly.
You can do a 9 by 3 inch rectangle with 3 inch squares, etc etc.
Step 3: Making the puzzle

We don’t usually do the puzzle this early in the game, but for the plus quilt, you kind of have too.
So let’s go ahead and make our puzzle using the pieces we’ve just cut.
Try and set yourself a perimeter where you’ll stop adding pluses.
And yes, you’ll have some pieces that will need to be trimmed and a couple of gaps that need to be filled.
And this is your patchwork puzzle, guys.
Step 4: Filling the gaps

Before we continue, we need to fill in our gaps.
We do this by removing the pieces from the pluses that go outside the perimeter we set and then we distribute them in the gaps, making sure no same fabrics touch, ok?
Then, for the gaps that are still left, let’s go ahead and get our fat quarters and cut out 2 inch squares to complete our rectangle.
And guys, how easy is the beginner sewing tutorial so far?
There really is nothing to it.
Step 5: Sewing the pieces

I’m chain sewing to save myself some time but, like I’ve mentioned earlier, I need to keep in mind where this chain begins and where it ends.
If by any reason I break the chain before I’m done sewing all the pieces.
Or, if when I’m done I just start cutting pieces at random, getting that puzzle back will be insanely hard!
So just make sure to keep that sequence in place so you’ll make live easier for yourself.
Step 6: Cutting the batting & backing fabric

Our next step is to cut our batting and our backing fabric.
We need our batting to be at least one inch larger than our top and our backing fabric to be at least 1.5 inches larger than our batting.
We do this because we’re self binding using the backing fabric.
And we don’t want the binding to fold over the pluses in the outer edges too much.
So by making the batting larger than the top, we’re keeping those pluses safe.
Step 7: Quilt as you go

Okay guys, let’s Quilt as You Go.
It may look complicated, but it really isn’t.
And it saves us SO MUCH TIME!
So let’s go ahead and pick our two first strips. We place one on top of the other, right sides together.
We’re doing this on top of the batting and the backing fabric that should be nice and centered.
Just don’t forget to leave a small margin on the bottom and on the sides of the batting, ok?
So we have the first two strips at the bottom overlapped and we just pin them in place.
And then we sew.
Once they’re nice and sewn we open the top strip up and add a third on top of that one and pin again.
We keep adding and sewing strips until we reach the top and there are no more strips left.
Step 8: Matching the squares

While you’re adding your strips, though, don’t forget we’re making a Plus quilt here.
That means that when we’re adding the top of a plus, we want that square to match the bottom plus exactly.
This is an important step, we want to prevent wonky pluses as much as we possibly can.
But if it happens, don’t worry.
I’m sure you’ll find a couple once this quilting tutorial is done too.
Step 9: Timming the excess

Now, our strips as nice and sewn and our top is complete.
All there’s left to do to it is trim off the excess.
All those extra pieces of our pluses that were left outside our perimeter.
But because we did Quilt as you go, we want to make sure we can trim them properly without cutting into the batting or the backing fabric, for that matter.
Not a problem!
We just fold the backing fabric inside and pin it to make sure that when we trim off that excess, no backing fabric will be caught by the rotary cutter.
After all we’ve done, it would be tragic!!
Step 10: Self binding

And this is a very simple step, all we need is to take our backing fabric and fold it over our top.
Fold it once to hide the raw edges and once again to bind our top.
Then we clip it in place and that’s it!
Don’t forget to miter those corners!
Step 11: Sewing the binding

Almost there guys!
All we need to do now is to sew our binding in place.
We want to sew as close to the inner edge as we possibly can.
And, as we sew, we remove our clips to make way for the machine foot.
Easy peasy!
Step 12: And it’s done!

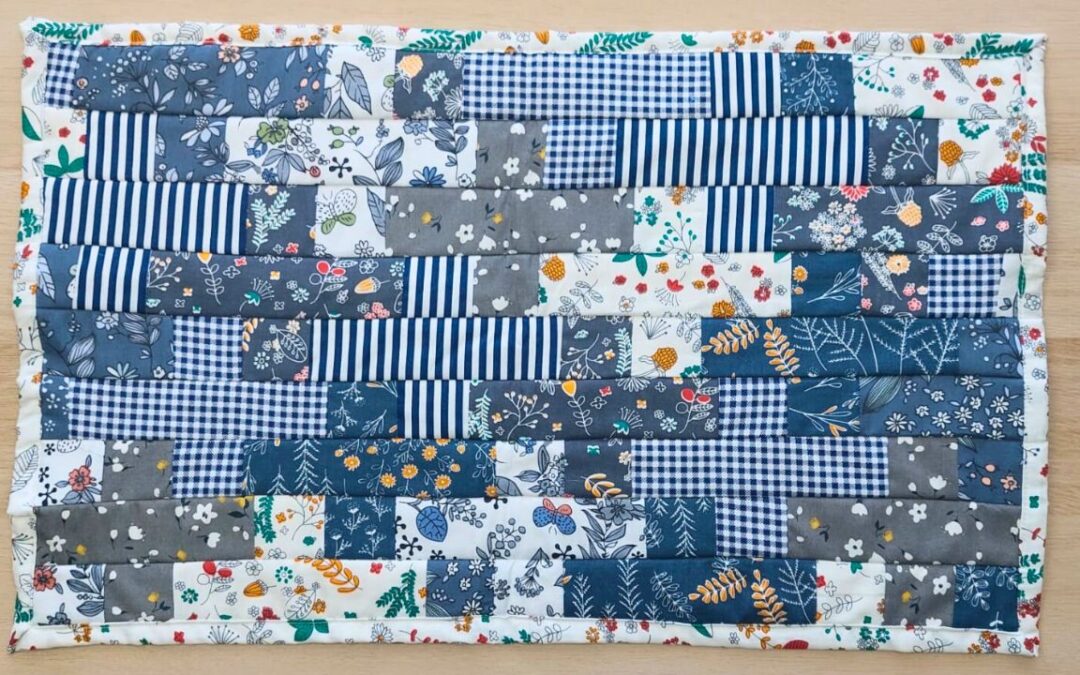
Here it is, guys.
Our Puzzle quilt pattern is complete and looking so so cute!
Even though we used similar colors, you can definitely see each plus and the colors work so well together.
And I know I usually go for the colorful projects, but how special is this?
I love it!
Watch the full tutorial!
And we are done and ready with our Plus Quilt Pattern.
How cute is this? And easy too!
And if you want to watch the video of this awesome Plus Quilt pattern getting made, here it is!
Most Recent Projects
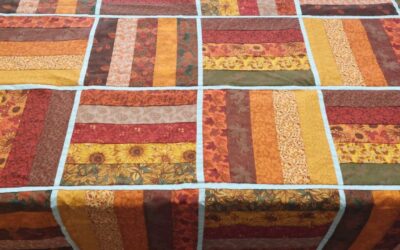
Incredibly Easy Stained Glass Quilt Pattern for Beginners
Today I’m making a stained glass quilt top. But...
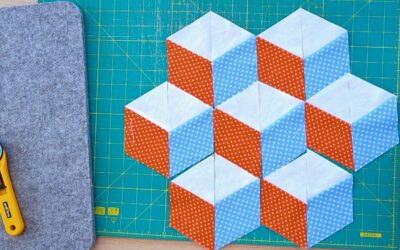
How to Make 3D Tumbling Quilt Blocks (No Y-Seams)
Today we’re a making tumbling blocks! And that...
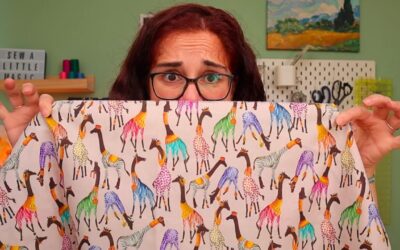
5 Practical Ways to Use Ugly Fabrics
Today I’m making a quilt using only ugly fabric....

About Me
I am a content creator, designer and maker of quilts and a hopeless cat lady. Being able to share all I know with you is a kind of magic I have never experienced before!