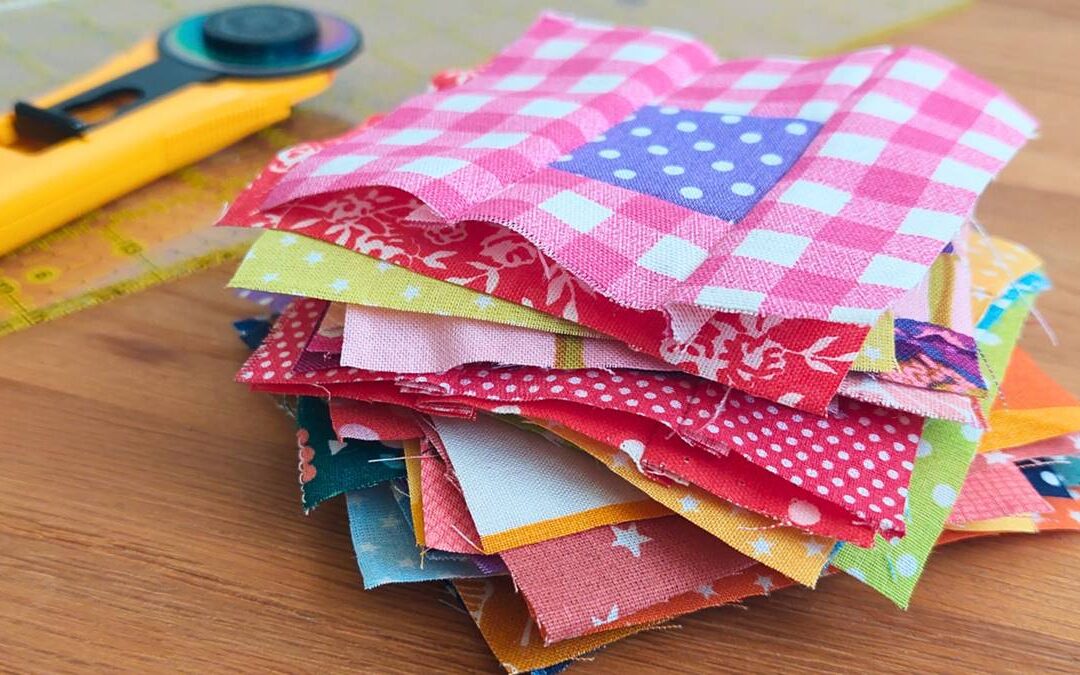
Are you ready for a scrappy adventure? Today we’re sewing the color wash quilt pattern made of cute squares with a little colorful centerpiece in the middle.
And the best part about this sewing project is we’ll be doing it using fabric scraps directly from my leftover stash.
Zero waste, maximum fun!
Sewing the Color Wash Quilt Pattern for Beginners
This is the best quilting for beginners tutorial I’ve ever done, you’re in for a treat!
So go ahead and get your fabric scrap pile!
We’re making scrappy, wonky squares with a little colorful center. Those are our quilt blocks. And then we’ll use them to create a lovely color wash quilt pattern.
We will be taking inspiration from the color wheel to make this very colorful patchwork quilt, so think rainbows!
Now, if you’re very OCD about things being parallel and straight, this may not be the quilting project for you. Personally, I love that each quilt block looks different and that you can’t make two alike.
In a nutshell, we will be creating a big rainbow with squares made out of colorful scraps of fabric, what’s there not to love?
Great Idea to Use Up All Leftover Fabric Scraps
For most quilters, leftover fabric is just a waste of fabric.
We will either immediately throw it away in the trash or we’ll save it with the good intention of using it later… only to end up keeping it stored somewhere… until it gets thrown out!

The great thing of a color wash quilt pattern is you actually need a big mix of fabrics in all colors, so the old fabric scraps that were once waste… are now pretty valuable.
So why is it so hard to use our leftover scraps? Because it’s easier to get a large piece of fabric and cut out what we need than to sort through a massive stash of small pieces of fabric to find an exact color and size.
Unless you need such tiny pieces of fabric then a scrap mix is actually perfect! Like for this sewing project!
About the Color Wash Quilt Pattern
We all lead very busy lives and the last thing we need is complicated, time consuming sewing projects when what we really need is to get our sewing fix without it ruining our schedules.
More often than not, the prepping alone takes so long that we end up giving up. Well, not with the color wash quilt top, this is as spontaneous, as smooth sailing as they come.
For this scrap quilt, you don’t need very precise fabric cutting.
If your strips of fabric are slightly larger than the needed size, you can just leave them as is and trim them once the quilt block is complete. As long as it isn’t smaller than needed, you’re good to go!
Also, this isn’t my quilt pattern, this patchwork quilt was created by Terry Rowland and you can check out her YouTube channel for more lovely color wash quilts.
Color Wash Quilt Supplies
- Several scraps (strips) of colorful fabric
- Rotary Cutter
- Rotary Blade
- 6” x 6” Quilting Ruler
- Cutting Mat
- Mini Iron
- Ironing Wool Pad
- Basic Sewing supplies: Pins, needles and thread
- ¼ on an inch foot (sewing machine)
Disclosure: some links are affiliate links. As an Amazon associate, I earn from qualifying purchases, at no extra cost to you.
Color Wash Quilt Requirements
We’ll need 2 different fabrics per quilt block. Ideally you’ll want to use different fabrics for each scrappy block but if that’s not possible and if you’re doing a big piece, that won’t be a problem.
I chose rainbow colors: pinks, purples, dark blues, light blues, greens, yellows, oranges and reds with centerpiece fabrics that contrasted the main fabrics.
I am making a total of 30 blocks with a final size of 4 inches. You’ll want to have about the same amount of blocks within the same colors as possible.
Since we’re making 30 blocks, 2 colors will have one less block. So you will have 4 blocks from 6 colors and 3 blocks from 2 colors.
Per quilt block, you’ll need:
- Main fabric: 2 strips 4.25” by 1.75”; 2 squares 1.75” x1.75”
- Centerpiece: 1 square 1.75” x 1.75”
Step 1: Sorting the fabric

Sort and prepare all required fabrics for at least 2 blocks. It’s much more fun and quicker to make at least 2 at a time.
This is the part where we spend a little time sorting through our scraps to find the fabric pieces we need.
This is what I do, when I find a fabric I like int the pile I search for other pieces of that fabric alone until I find fabric scraps with a big enough size for what I need for a main fabric.
Then I go back and find a smaller piece for the centerpiece, which is so much easier to find.
That is why this is the best quilting project to use your small scraps of fabric.
Step 2: Sewing the center

Sew the center pieces. Take one 1.75 inch square from the main fabric and the colorful 1.75 inch centerpiece and sew them, right sides together. That’s block 1.
Follow with the same fabrics for the second block.
Now go back to Block 1 and add the second 1.75 inch main fabric square to the other side of the colorful centerpiece square.
Repeat for block 2.
Once you’re done you’ll have one strip per block with 3 squares with the following order: main fabric, centerpiece, main fabric.
Step 3: Building the quilt block

Sew one strip of the main fabric (the ones that are 4” x 1.75”) to one of the sides of the center strip we’ve just sewn. Right sides together.
Now do the same for block 2.
Now add the other main fabric strip to the other side.
Repeat for Block 2.
It’s as simple as that, the best sewing project idea for beginners ever, as promised!
Step 4: Pressing the quilt block

Press your newly sewn squares and make them nice and flat.
You’ll want to make sure to press the seams in particular, we want to be able to look at our quilt blocks and not see the difference in height between the layers of fabric and the seams that join them.
Don’t forget to press the fabric without ironing it around in order not to bend the fabric out of shape.
Step 5: Trimming

Trim your blocks to the desired length.
When you’re sewing with fabric scraps, you know there will be plenty of excess fabric to trim!
I’m making my quilt blocks 4 inches, but if you make yours smaller you can shift the centerpieces to the sides, top or bottom to make them uneven.
That means all your blocks will look completely different.
But if you want your centerpiece to remain in the center of your block, just go ahead and trim all the extra fabric keeping the centerpiece in the middle of the block.
Step 6: Your first blocks are done!

Your first 2 quilt blocks are complete and looking awesome!
Who would have know you could make such perfect quilt blocks out of scraps of fabric?
Step 7: Repeat step 1 to 6

Now you need to repeat all the previous steps 28 more times (well, 14 if we keep making 2 at a time).
You can also organize all the remaining blocks and chain sew them, following all the previous steps.
So make small piles of fabric with all the pieces you need for each block, start by sewing the center strip and then add the sides, doing one step at a time for all of them in a row.
Step 8: Organize your blocks

By now you should be looking at 30 lovely colorful 4 inch blocks.
Now comes the color wash! On a table or some other large surface, organize your blocks by color sequence. I suggest you start from the upper left corner.
First come the purple blocks, if you’ve got 4 purple blocks, do a tiny square. Then dark blue blocks that will fit around that square, then light blue, green, yellow, orange, red and you will end up at the bottom right corner of your quilt top with the pinks. We’re doing 5 rows of 6 blocks.
Can you see the color wash? How the colors change from one to the other like a wave? So cute!
Step 9: Sew the rows
Now we sew! Start by sewing the rows first. Press those seams nice and flat.
Step 10: Sew the columns

Now it’s time to sew our columns together. We want to nestle those seams, that means that whenever the seams meet, we want to put the seams from one row to the left and the seams from the second row to the right.
That way we won’t create a bulk and everything will be nice and flat.
Pin those seams in place to make sure you’ll be able to sew without them moving.
Step 11: Press the quilt top
Press our quilt top to make it nice and flat. We want to press it, not iron it, meaning we won’t be moving the iron around because that may make your fabrics wonky.
We just drop the iron in place, keep it there for a few seconds and then move on to a different section, no dragging the iron around, please.
Step 12: Trim the quilt top

Trim all the excess fabric off, if there is any. And that’s it! Our quilt top is done! How fun was this?
There are so much fun (an unique) scrappy quilt block patterns you can try. Happy sewing!
Watch the full tutorial!
I loved each and every step of it, I’m already thinking of all the other projects I can make using these quilt blocks. Give it a try and let me know how it went!
And if you want to watch the video of this quilt top getting made, here it is!
Most Recent Projects
Incredibly Easy Stained Glass Quilt Pattern for Beginners
Today I’m making a stained glass quilt top. But...
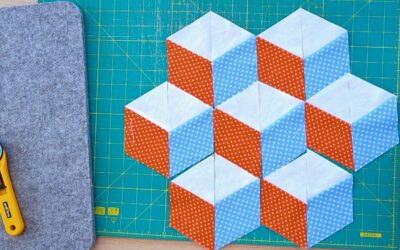
How to Make 3D Tumbling Quilt Blocks (No Y-Seams)
Today we’re a making tumbling blocks! And that...
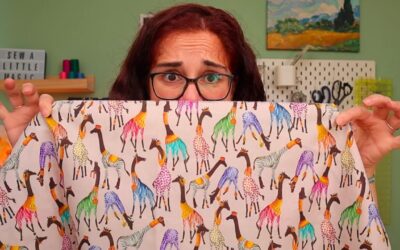
5 Practical Ways to Use Ugly Fabrics
Today I’m making a quilt using only ugly fabric....

About Me
I am a content creator, designer and maker of quilts and a hopeless cat lady. Being able to share all I know with you is a kind of magic I have never experienced before!