Today we’re a making tumbling blocks!
And that means that whatever you do with them, whatever project you have, you won’t have to cut into the cubes, which I personally don’t like at all.
We’re leaving them whole and intact and just adding a little border around in a different color.
And I know that, if you’ve never made one of these cubes before, it looks complicated and fussy.
But it isn’t, it really isn’t, not the way I’m making them.
This is the ultimate beginner tutorial.
What’s a Tumbling Quilt Block
A tumbling quilt block pattern creates a 3D effect by using contrasting colors and a geometric pattern.
For our tutorial, we’re making cubes that, when we combine the colors in the perfect way, appear to be 3D.
I would say that cubes are the most used geometric shape to create this 3D quilt block pattern, although I’ve seen some triangles and some hollow cubes that look absolutely stunning!
Tumbling quilt block patterns are very intimidating looking and most beginner quilters love looking at them but refuse to try creating it.
Well, that changes today!
How to Create a 3D with Tumbling Quilt Blocks
So what exactly do we need to do to make sure we achieve the optical illusion of that 3D cube?
It really is all thanks to the fabrics we pick and how we combine them.
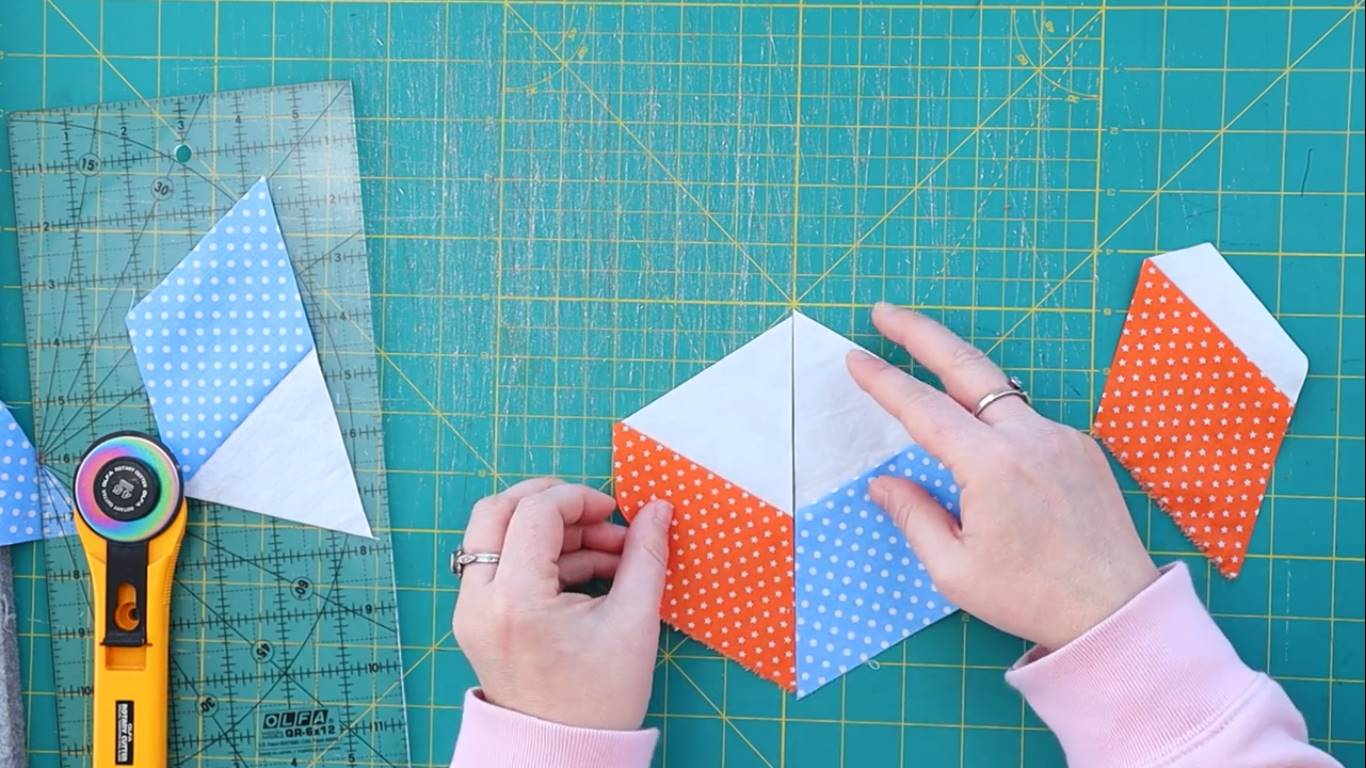
By using a light, a medium and a dark toned fabric, we are able to create the effect of shade.
We place the lighter fabric on top and the two medium and dark fabrics on the sides and them for all the cubes we make, we make sure that the fabrics are placed in that exact same position.
If we were to switch fabrics, the entire effect would be ruined.
Keeping them all in the same positions, it kind of looks like we’re shinning a light at our cubes and that the darker toned fabric is in the shade.
And that’s how we get 3D!
Easy Tumbling Block Quilt Pattern for Beginners
This is the tumbling quilt block pattern for beginners for a reason.
For most people, creating this quilt pattern is a daunting idea because of a very simple detail: The y seams it requires.
The traditional way of making a tumbling quilt block pattern requires some y seam sewing and that’s just too much for a beginner quilter.
So, in order to make this a beginner tutorial, I’m making tumbling blocks without Y seams.
It just doesn’t get any easier than this!
This is truly one of the easiest 3D quilt block patterns!
Tumbling Block Quilt Pattern Supplies
- Dark tone fabric
- Medium tone fabric
- White fabric
- Border fabric
- Rotary Cutter
- Rotary Blade
- 24” x 24” Quilting Ruler
- Cutting Mat
- Mini Iron
- Ironing Wool Pad
- Basic Sewing supplies: Pins, needles and thread
- ¼ on an inch foot (sewing machine)
Tumbling Block Quilt Pattern Requirements
For this pattern, I’ll need:
- Dark tonned 3 inch strip
- Medium tonned 3 inch strip
- White 3.5 inch strip
- Different fabric for borders (3 inch strip)
Step 1: Select the fabrics
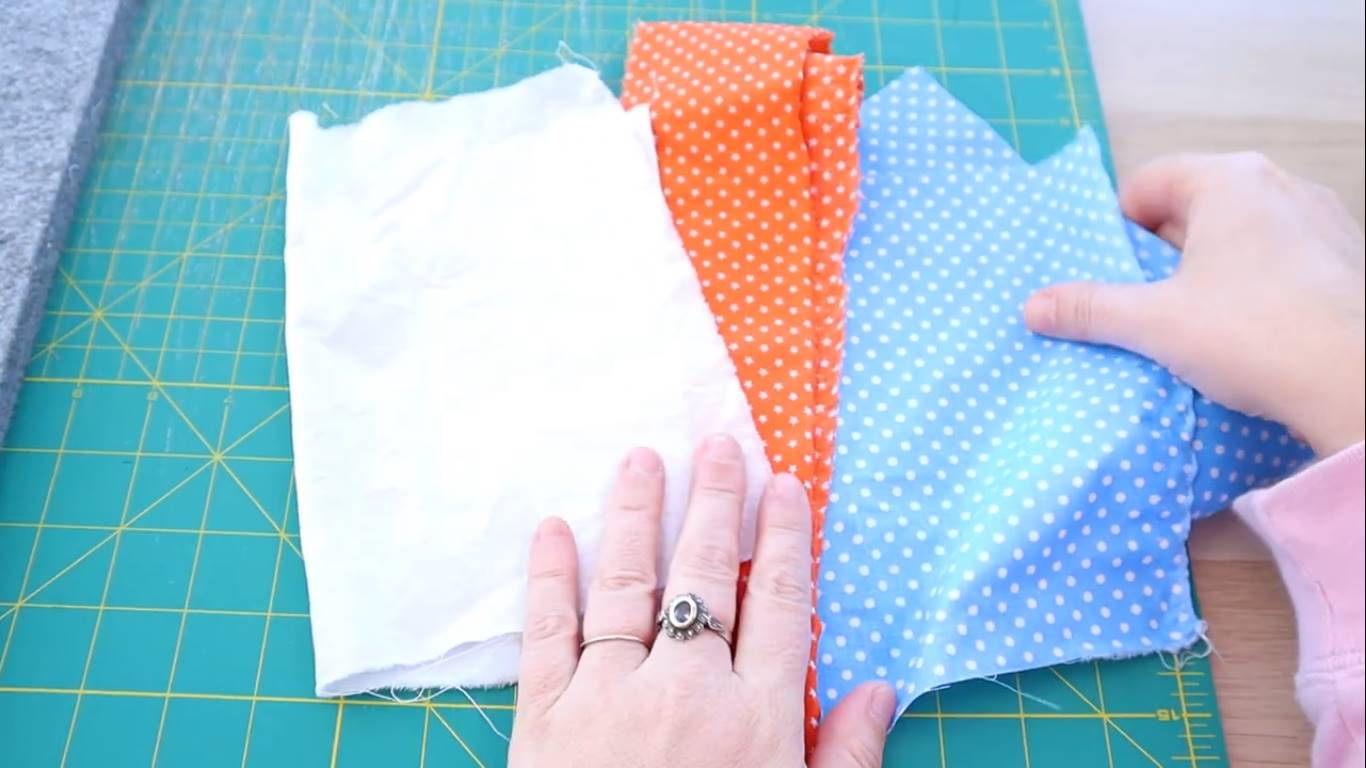
So here I have 3 different fabrics.
A white, a light fabric and a darker fabric.
You can pick any pattern or color for the light and darker fabrics but I do advise that the fabric you pick for the top of the cubes, which is the white one for me, is a solid.
And this is because making tumbling blocks without a y seam requires splitting them in half so you will get a seam in the middle of the top of your cube.
If you pick a fabric that isn’t a solid, that seam will show.
If you use a solid, like this white, you won’t even notice it’s there.
Step 2: Cutting the strips
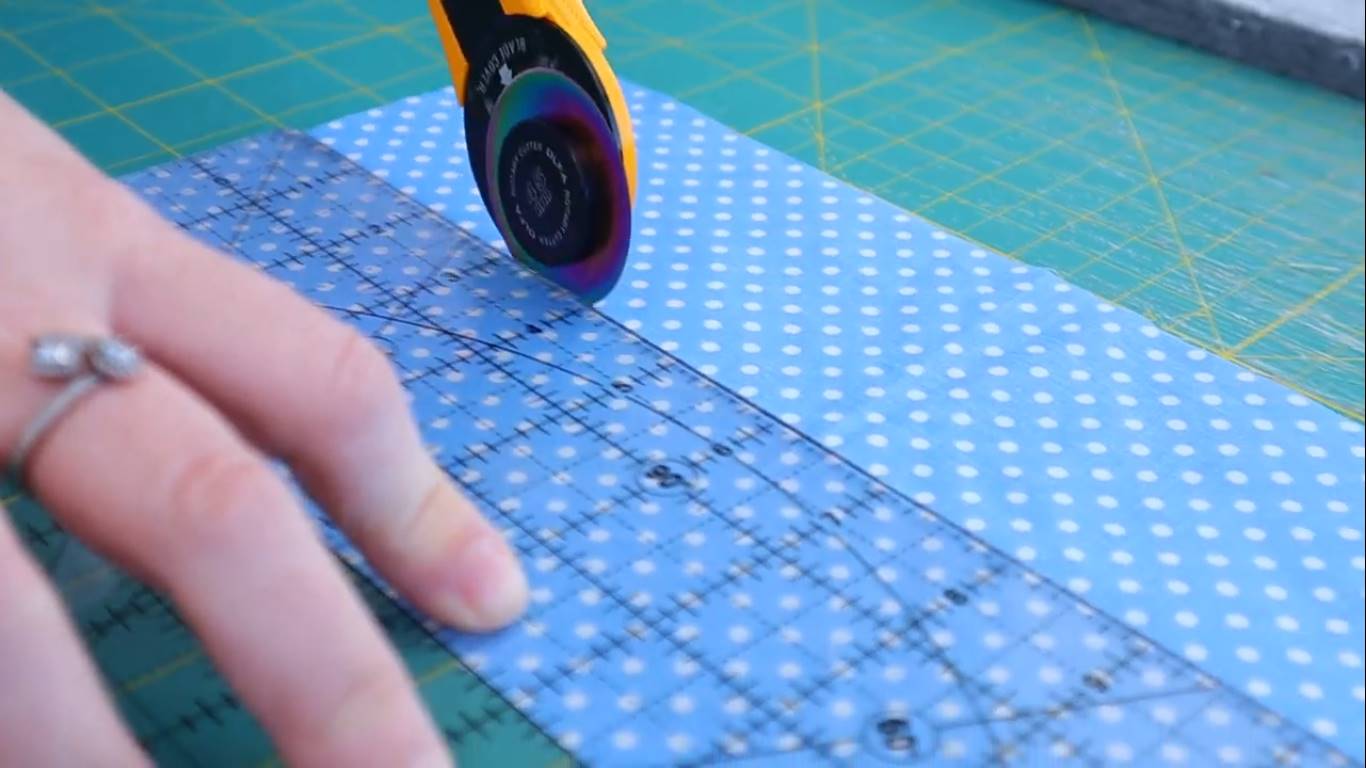
We need 2 strips of fabric for each color.
3 inches for the patterned fabrics, 3.5 inches for the white fabric.
The length of the strips depends on how many 3d cubes you’ll need.
I’m making 7 cubes today, so I don’t need a lot of fabric.
And if you’re using scraps it doesn’t need to be all in one piece, ok?
Step 3: Sewing the strips together
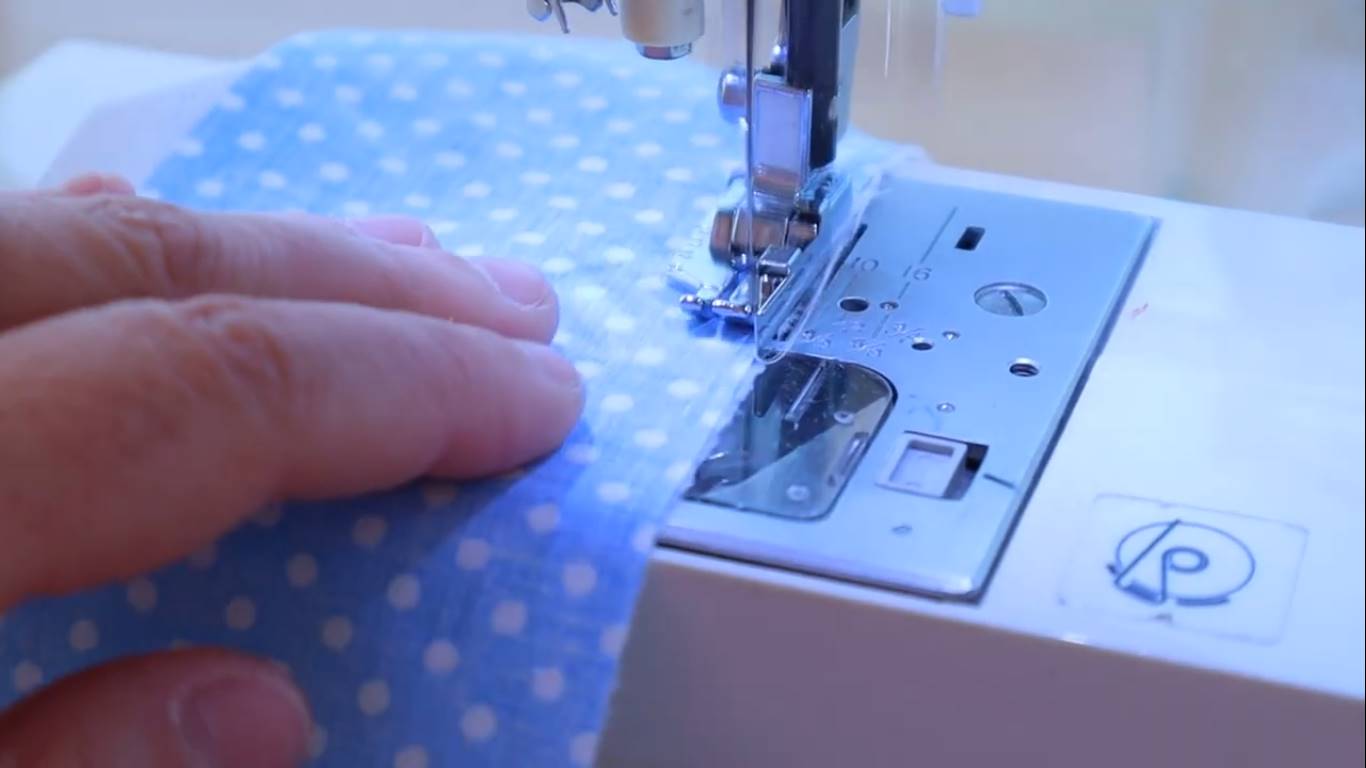
We split these fabrics into 2 pieces.
One white stripe and two strips in one of the patterned fabrics and another one just the same but with the other fabric.
So far so simple, right?
Let’s sew using our ¼ foot. That’s a big deal for our math here.
Step 4: Cutting the strips at a 60º angle
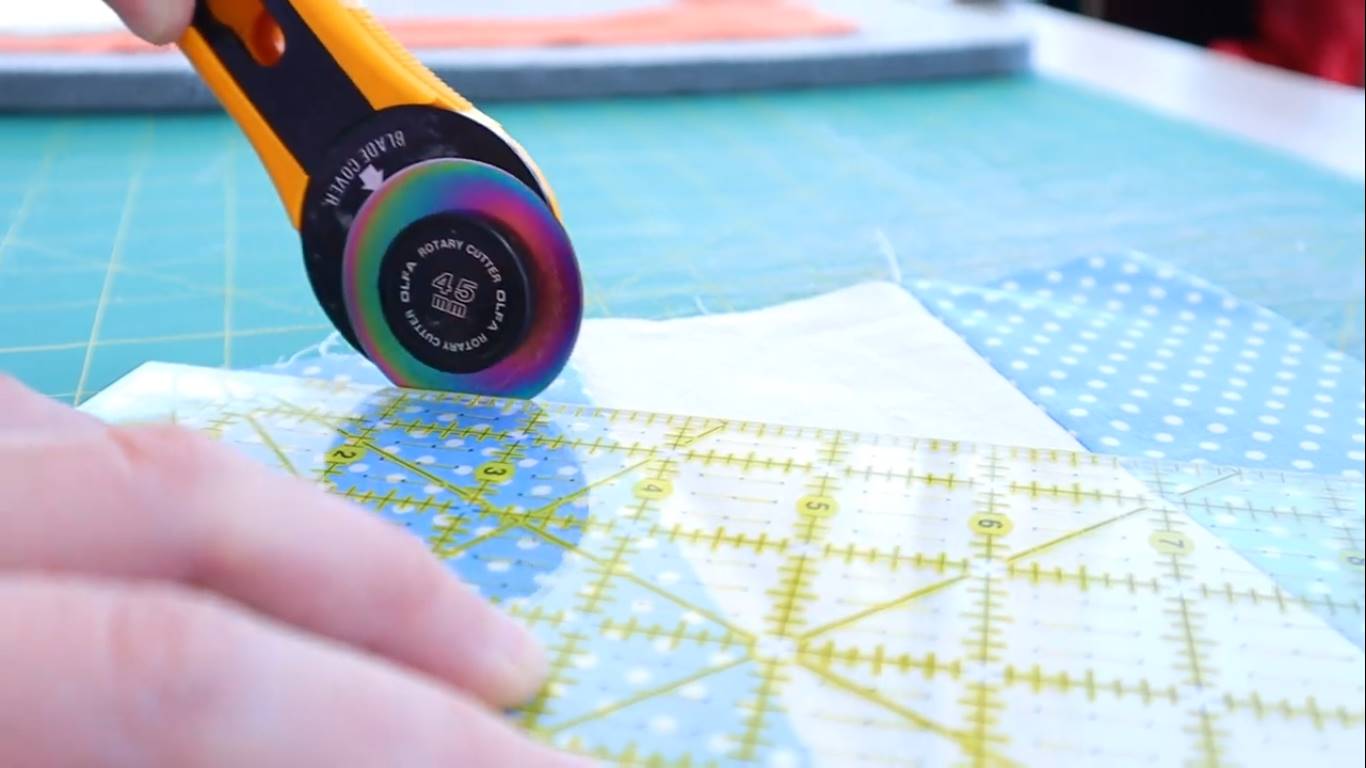
And now comes the angle cutting. Now, this does not need to be scary or complicated.
All you need is the right ruler, with the 60º angle and a good, sharp rotary cutter or scissor.
We need to cut each piece in different directions.
So for the first one we cut off the top of the strip making that 60º from the start.
And then we cut 4 3 inch pieces.
I’m making it 3 inches because that was the size of the patterned strips I had, if yours are larger or smaller, you need to adjust.
Step 5: Cutting the strips in half
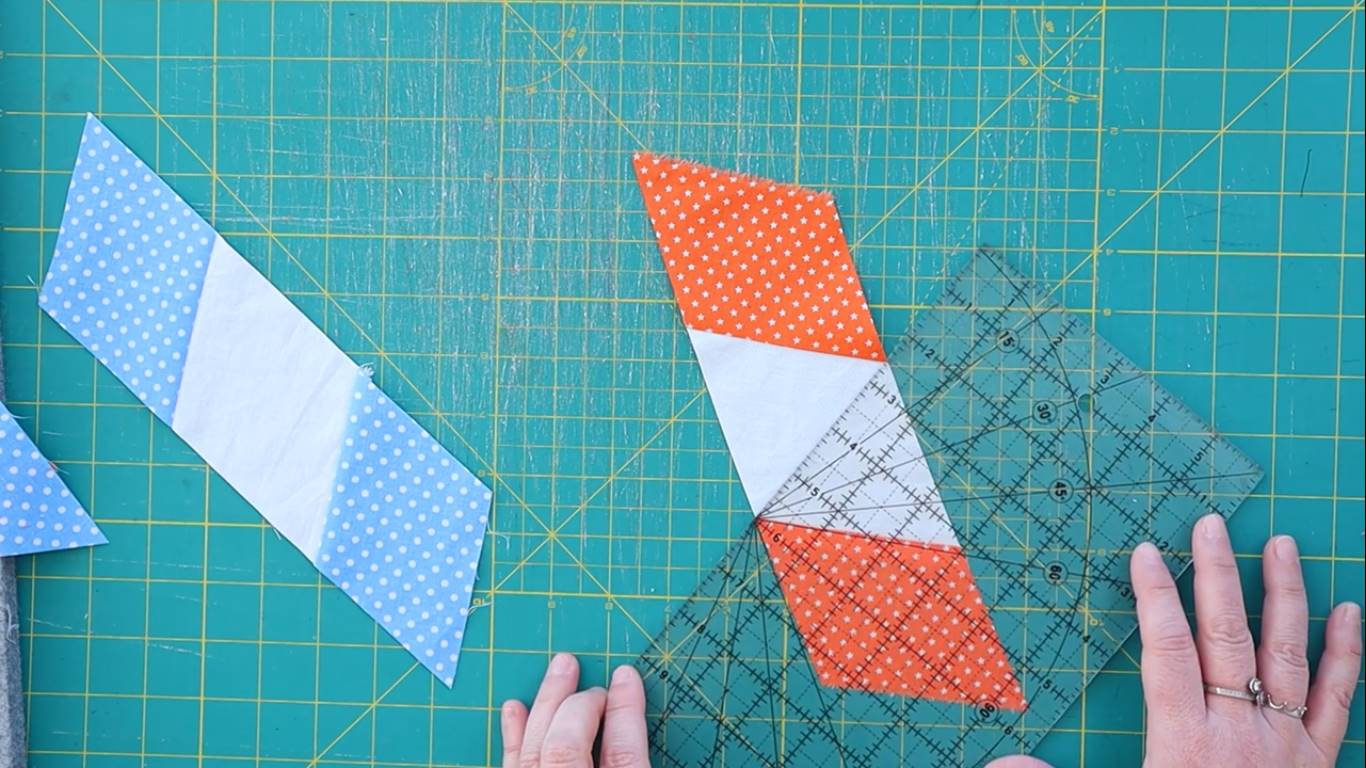
Now we just need a couple more cuts because, like I’ve promised, we won’t be sewing any y seams for these cubes, so we need to cut our piece in half.
Turning our white pieces into triangles by cutting them at a 60º angle.
Step 6: Create the tumbling pattern
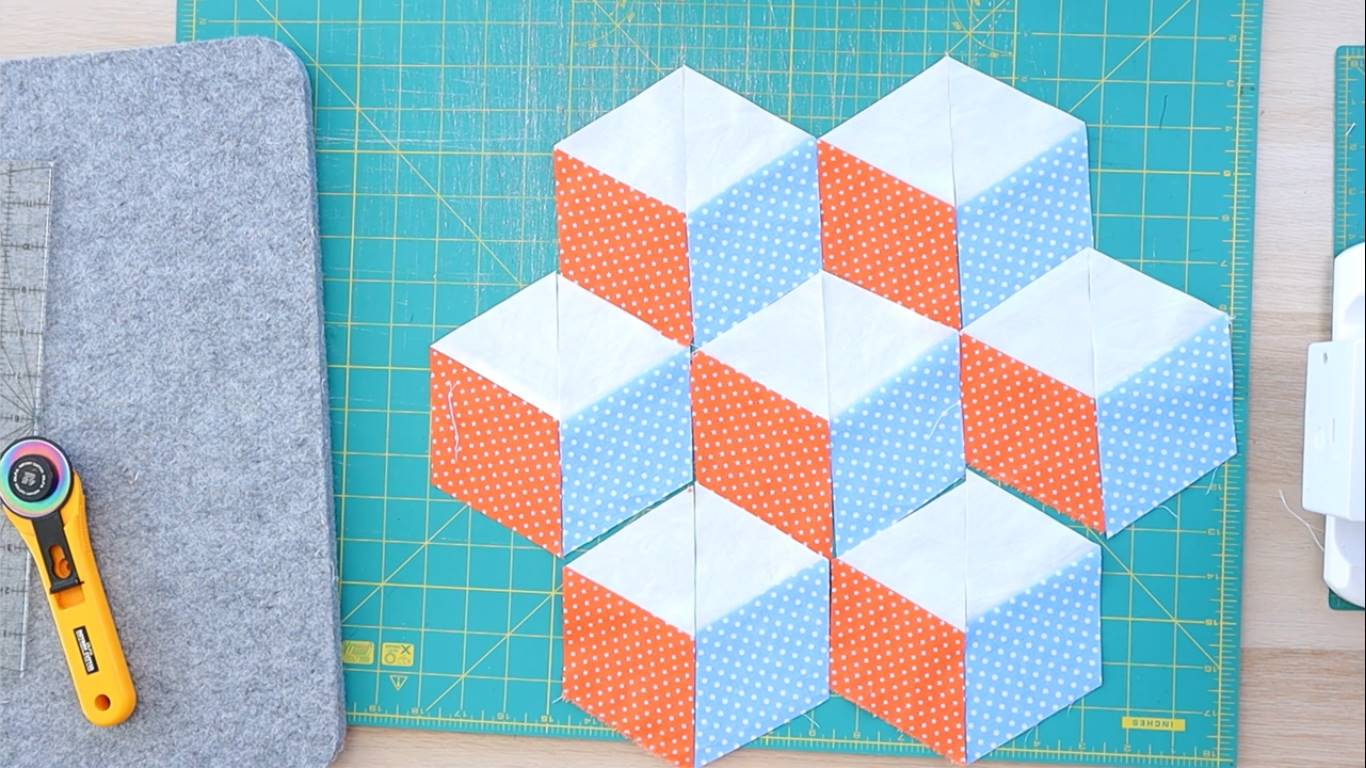
Now, it’s puzzle time, my favorite time as always. Let’s make some cool 3D cubes.
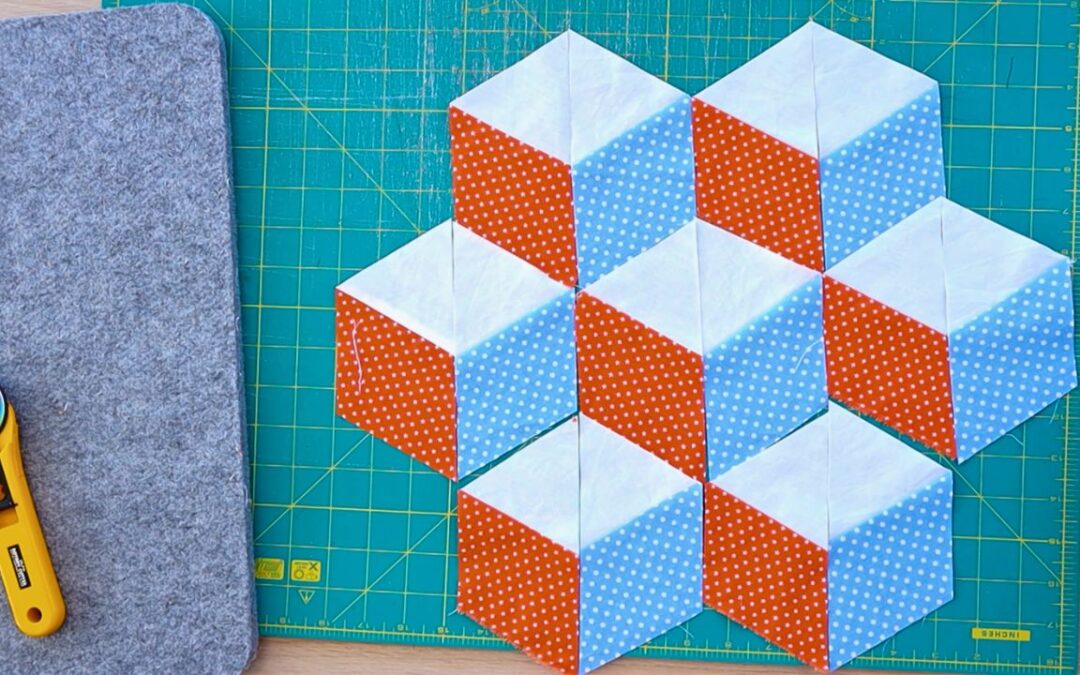
We need to make sure all blocks are the same because what gives us that 3D look is the shade.
So we put the lighter fabric, the white, on top, the medium fabric to one side and the darker fabric to the other and that way you’re mimicking light and shadow and how the light would hit all cubes if they were 3d, the exact same way.
And that’s why it looks so cool.
You can pick different fabrics and colors for each cube as long as you follow this rule.
This is the shape I want, this flower-like shape, I just love the overall look of it.
But, if you’re looking for a square, just go ahead and make more cube pieces to fill the space up.
Step 7: Cut the border diamonds in half
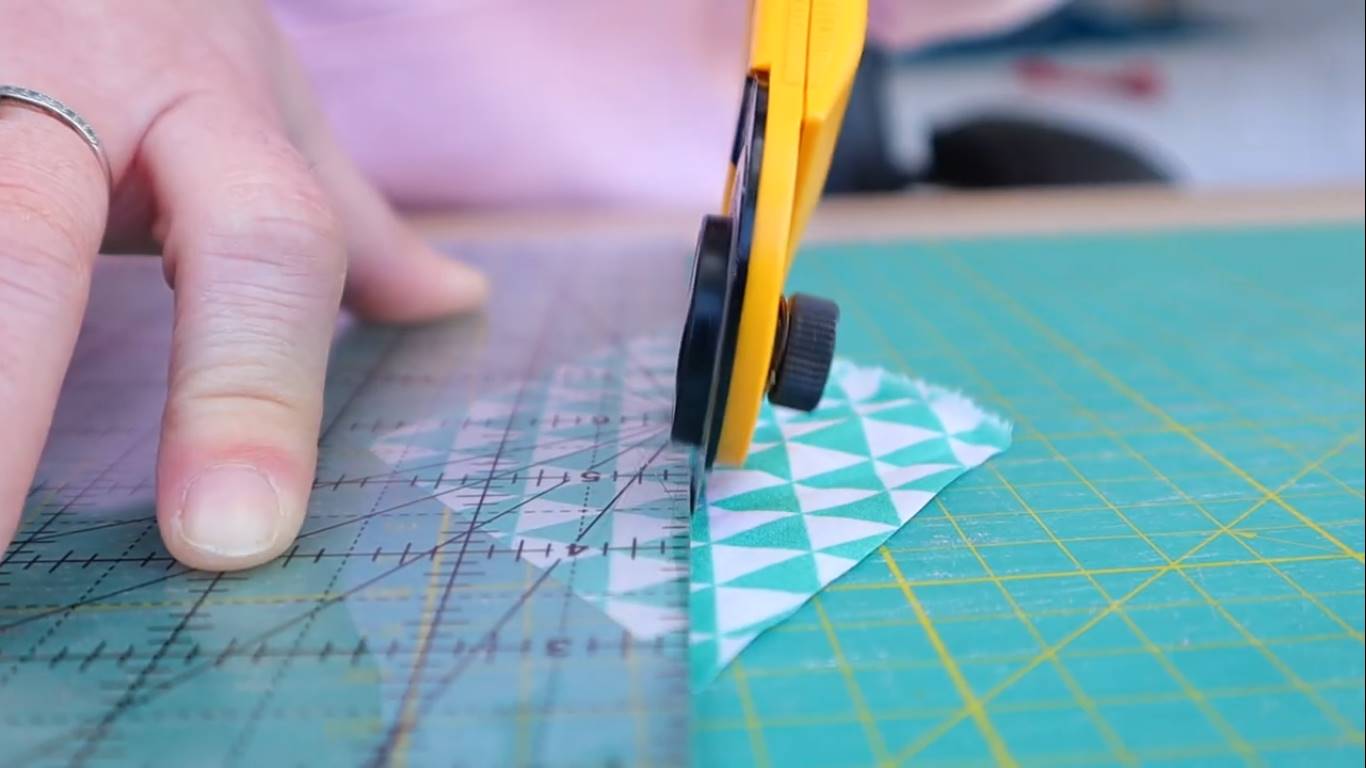
As far as our borders go you can add them right now or add them later.
We cut the border diamond in half, keep this bit in one single piece.
Step 8: Add a border triangle all around
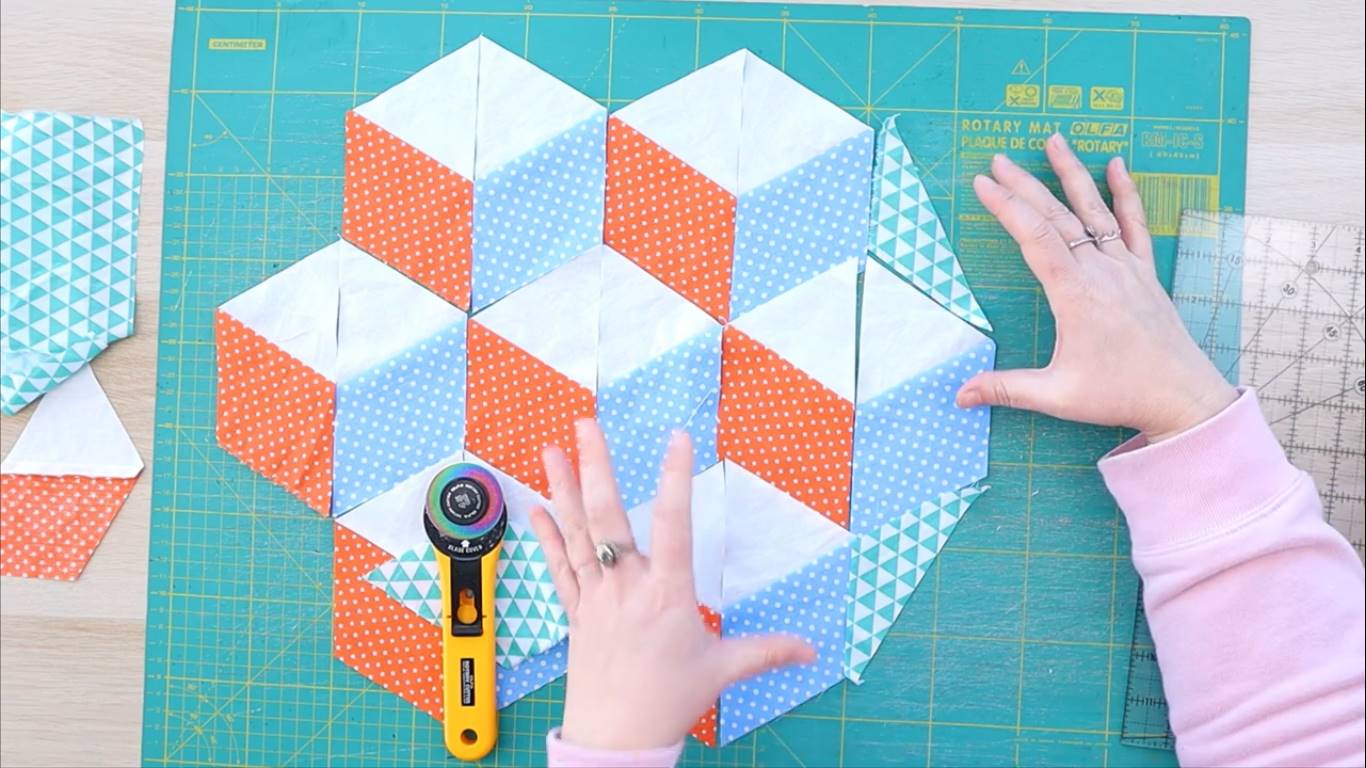
That way we can add it to our original cube shape and flatten those cube curves that made it impossible for us to sew.
Step 9: Sew the pieces together into strips
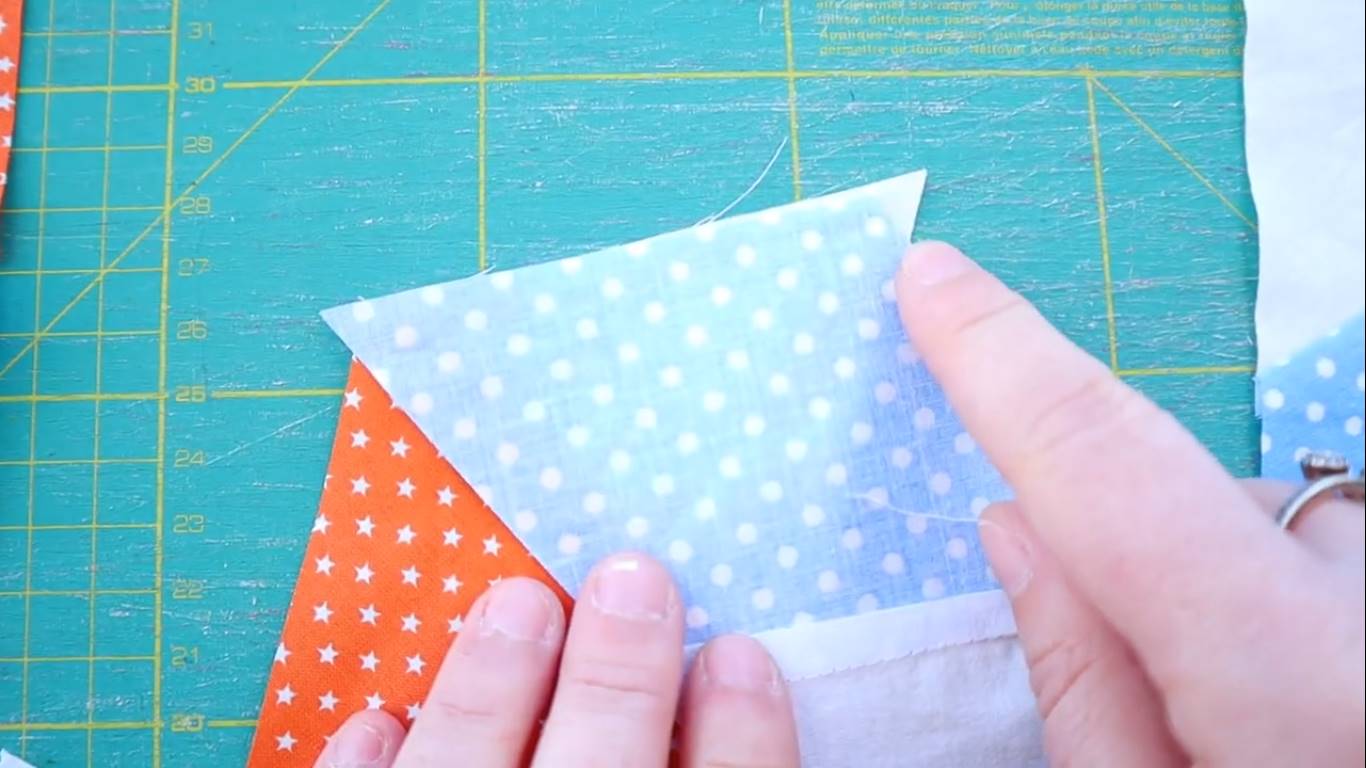
We start but sewing our half cubes in strips.
But there’s a catch!
To make sure our pieces are all lined up, make sure that when you place on piece on top of the other, you have the corners poking out, about 1/4 of an inch on each side.
Step 10: Sew the strips together
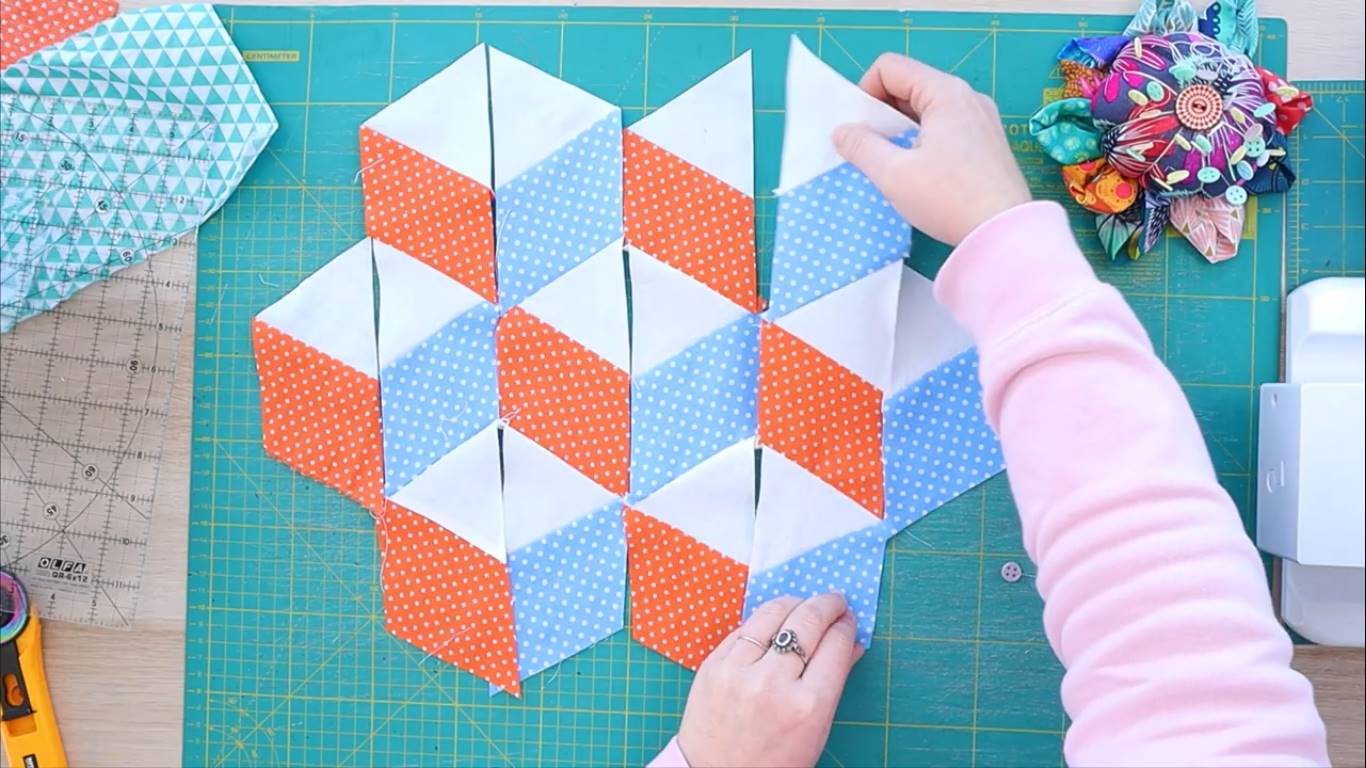
Our quilt is looking gorgeous already but it’s time to sew all the strips together.
Now, for this pattern, nesting the seams and making sure they’re right where they’re supposed to be is very important.
This is all about geometric shapes, there isn’t a lot of room for error.
Step 11: Add the corners
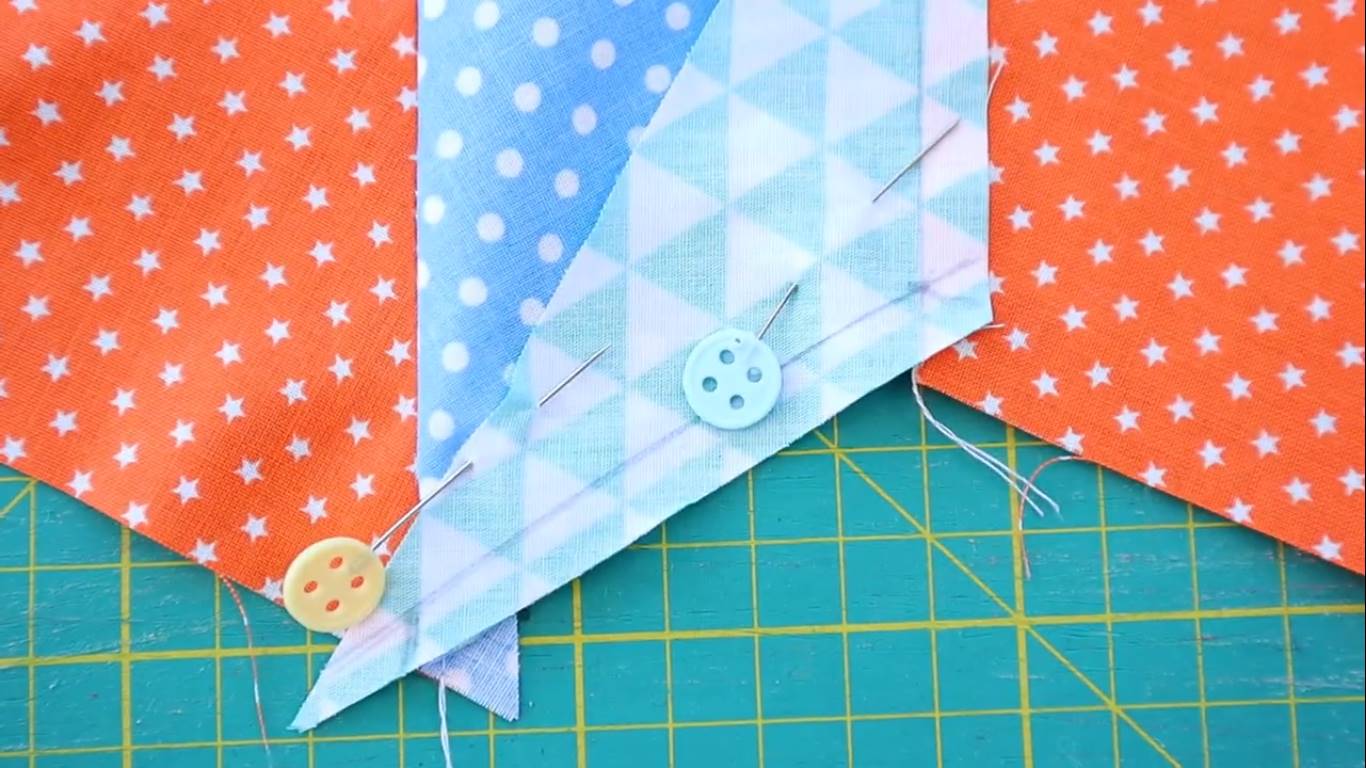
I’m just going to say it, the borders look much better if we do a little of y seam sewing.
But the thing is, there’s nothing to it! All it takes is a little bit of marking.
We add a 1/4 inch line to know where to sew and we mark where to stop sewing, on both corners and on the middle tip of our triangle.
If you sew only where your lines and markings are, you’ll get perfect y seams and gorgeous, flat borders.
Step 12: And that’s it!
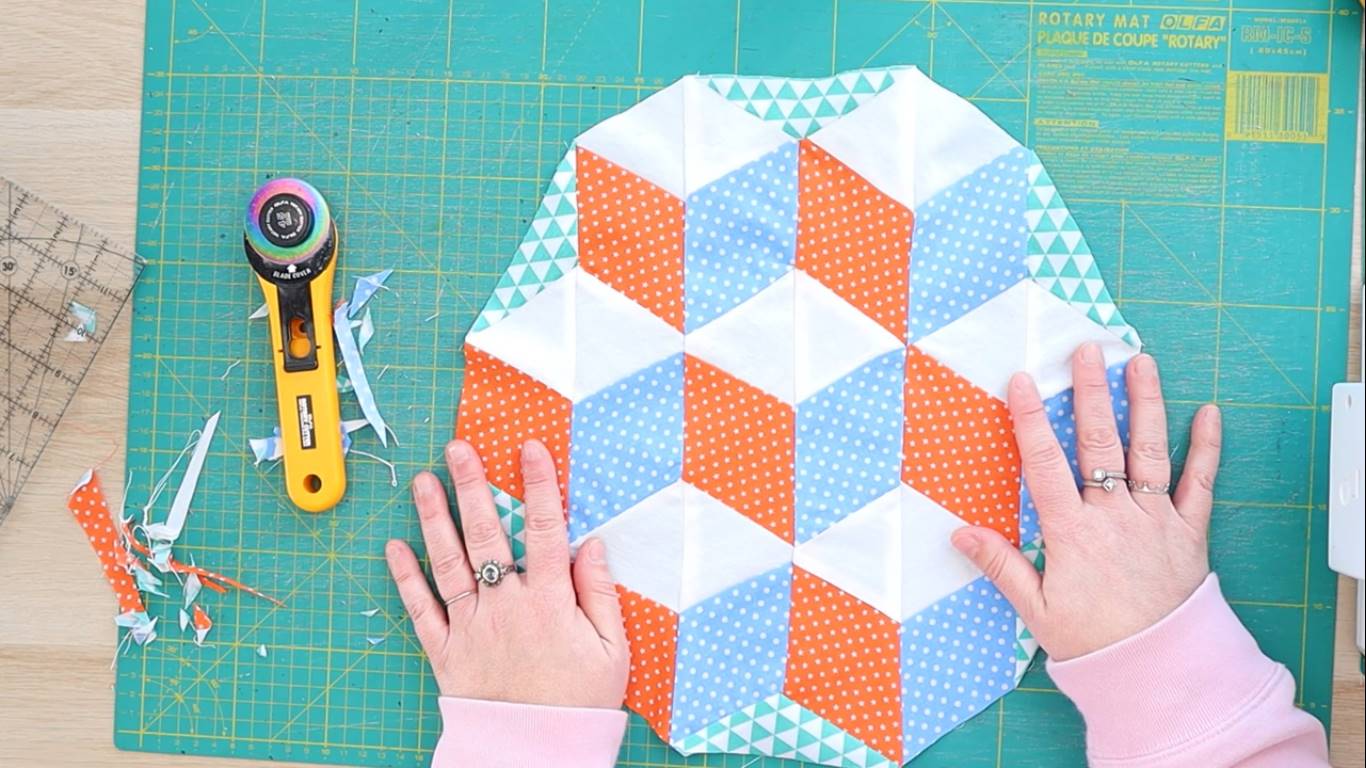
And here we have it, our tumbling quilt block hexagon ready to go.
How fun was that?
After this, you’ll never need to be afraid of 3D cubes or y seams ever again!
Watch the full tutorial!
Guys, how much fun was that?
And how easy and amazing is this tumbling block quilt pattern?
And if you want to watch the video of this beautiful quilt getting made, here it is!
Most Recent Projects
Incredibly Easy Stained Glass Quilt Pattern for Beginners
Today I’m making a stained glass quilt top. But...
5 Practical Ways to Use Ugly Fabrics
Today I’m making a quilt using only ugly fabric....
Easy Watercolor Quilt Pattern Ideas
Today I'm making an easy watercolor quilt...

About Me
I am a content creator, designer and maker of quilts and a hopeless cat lady. Being able to share all I know with you is a kind of magic I have never experienced before!

I like what you stated minimum effort maximum appeal
that’s the goal! heheh